Search Results: "tora"

1 July 2023

Debian Brasil: MiniDebConf Bras lia 2023 - um breve relato

Minidebconf2033 palco 
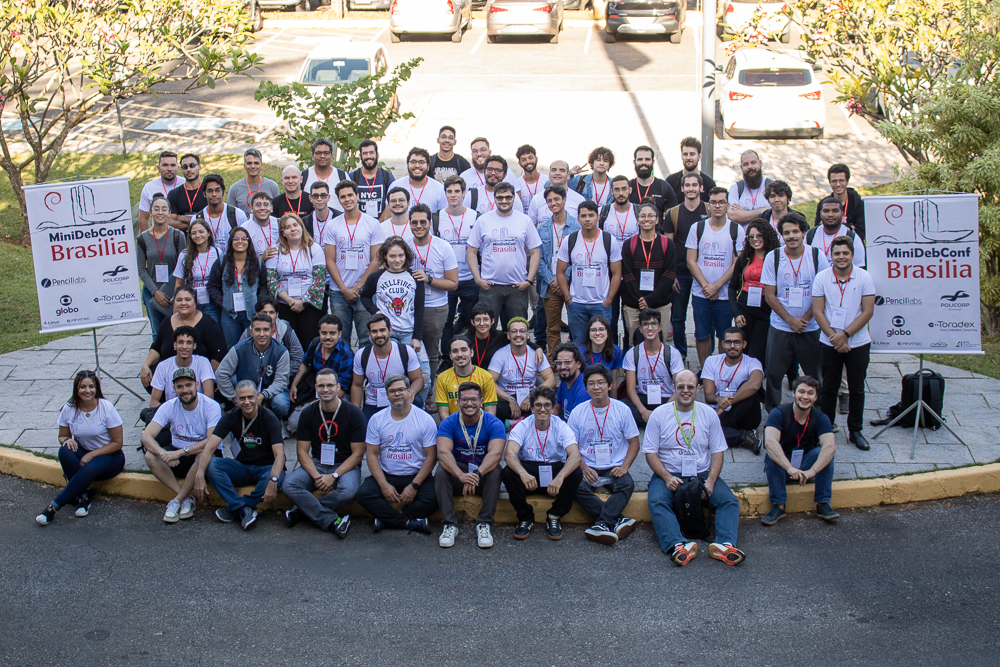
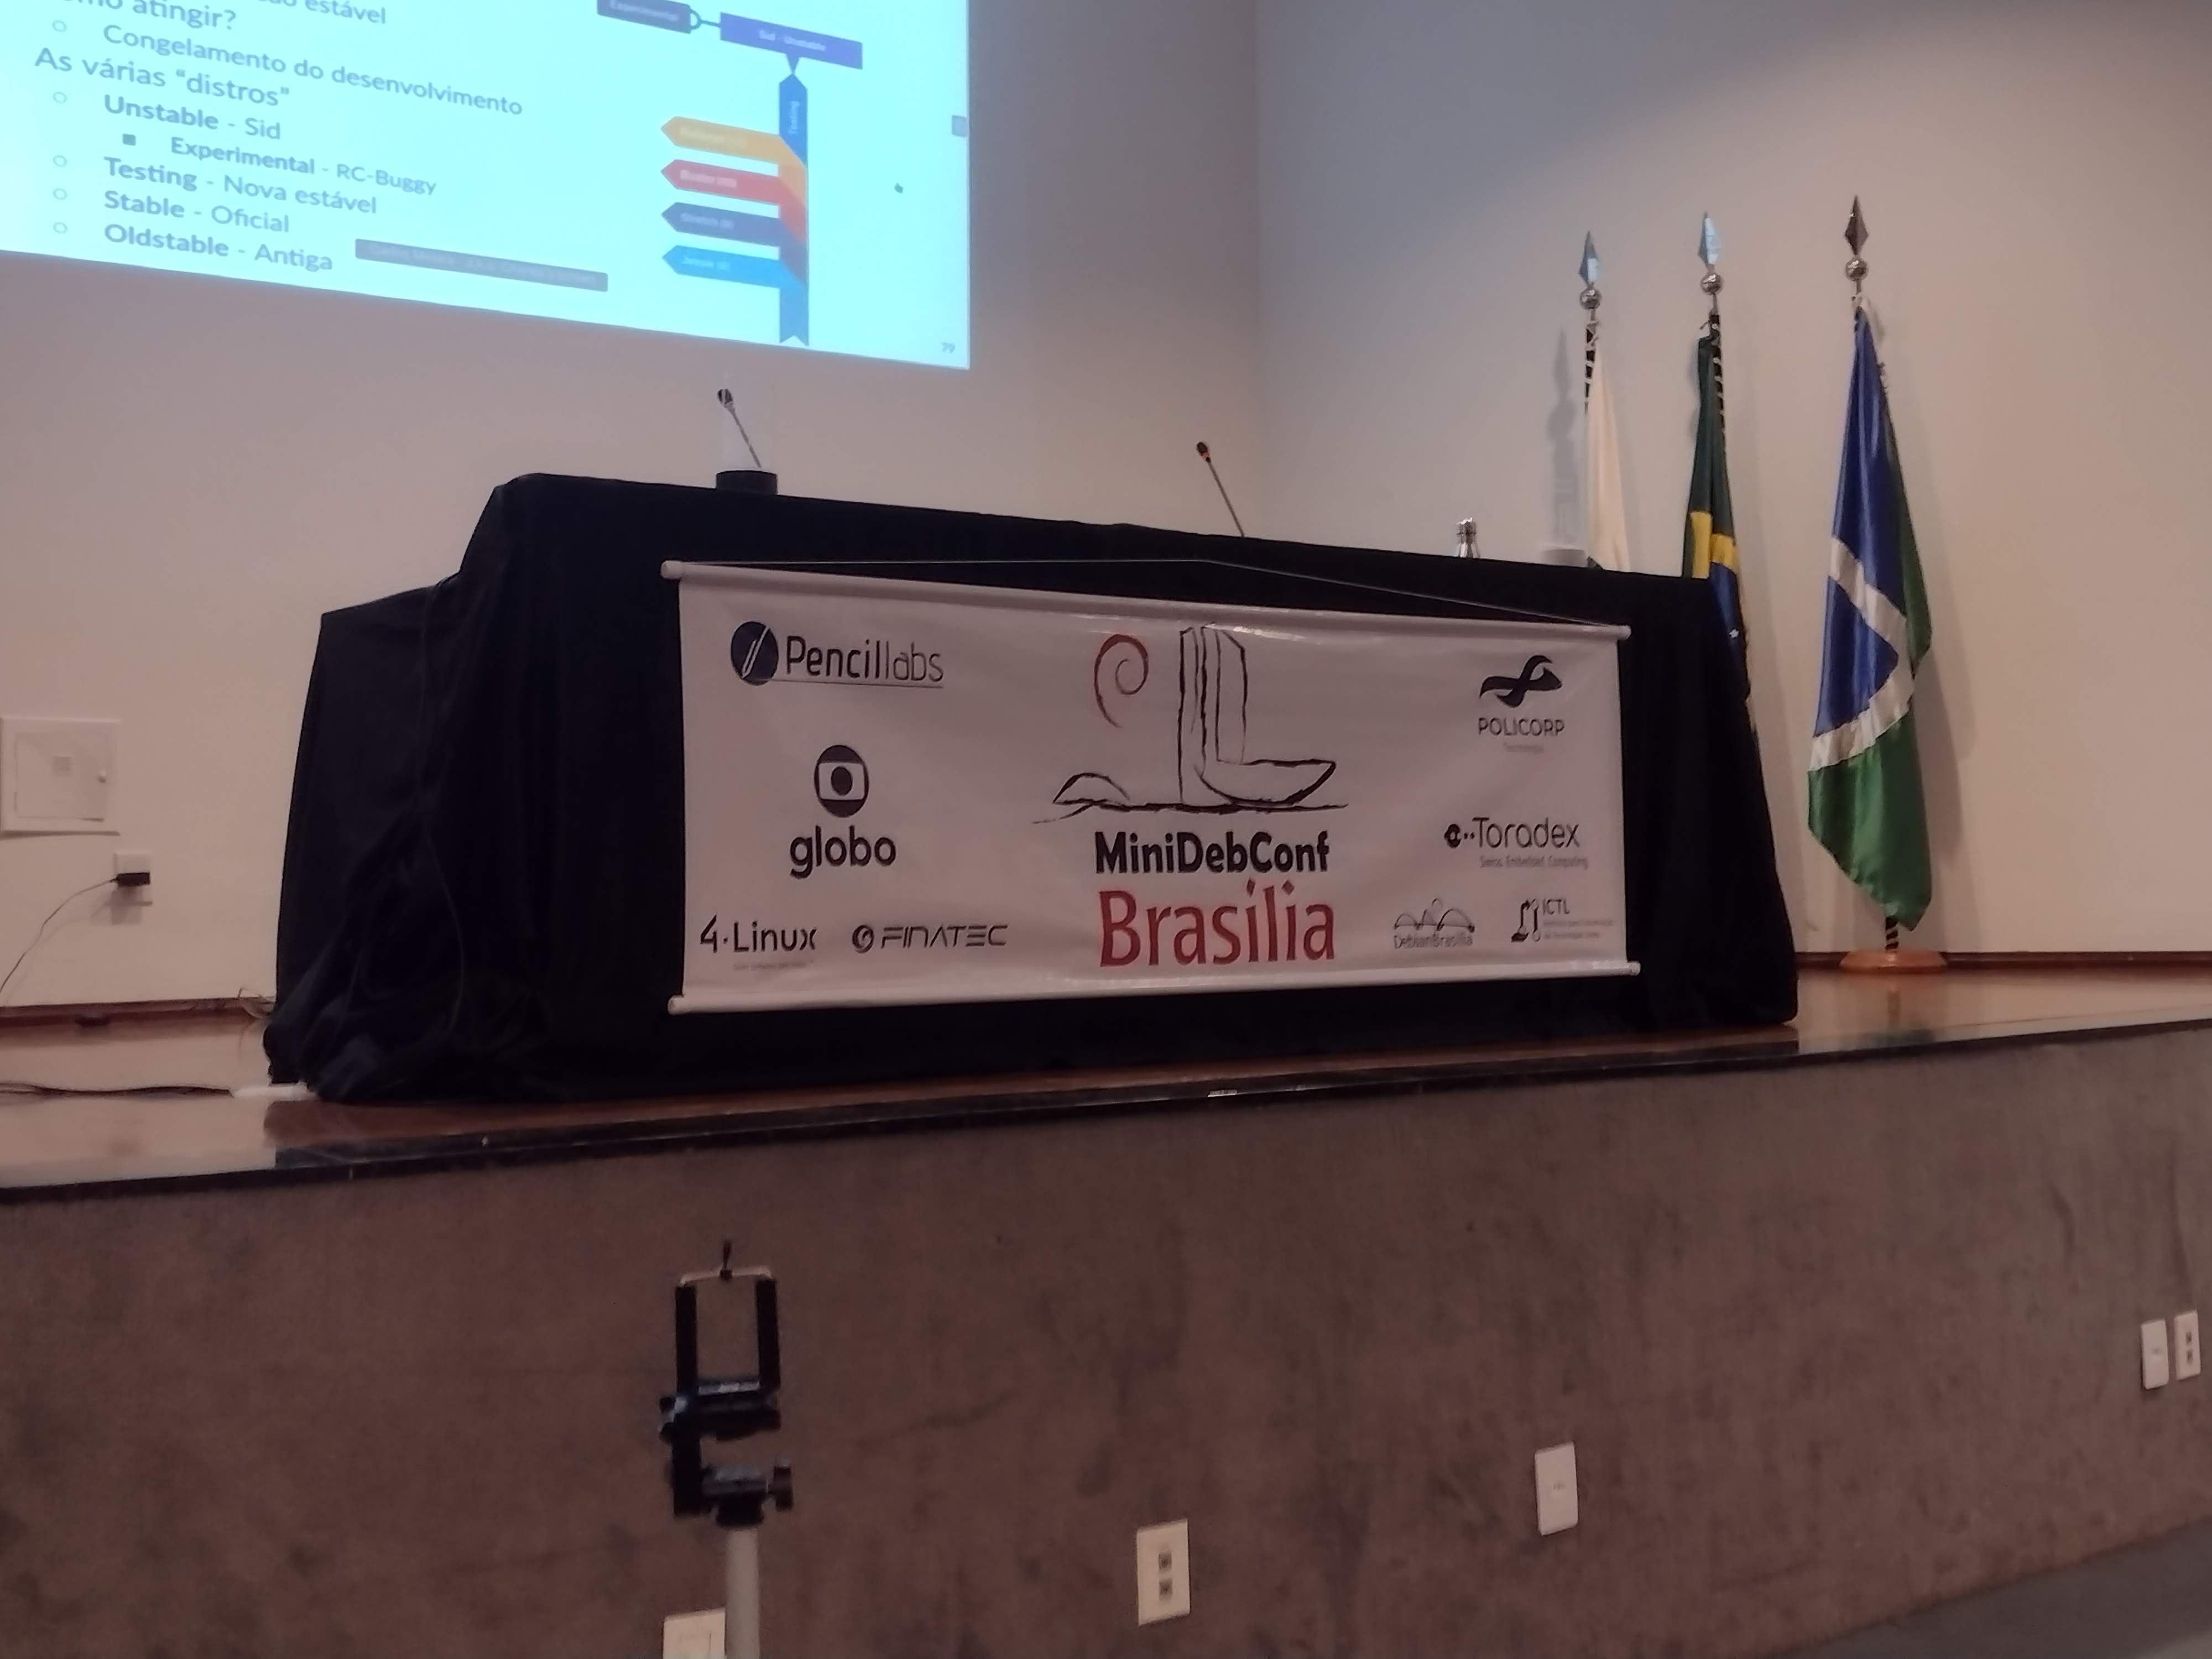
No per odo de 25 a 27 de maio, Bras lia foi palco da MiniDebConf 2023. Esse encontro, composto por diversas atividades como palestras, oficinas, sprints, BSP (Bug Squashing Party), assinatura de chaves, eventos sociais e hacking, teve como principal objetivo reunir a comunidade e celebrar o maior projeto de Software Livre do mundo: o Debian. 
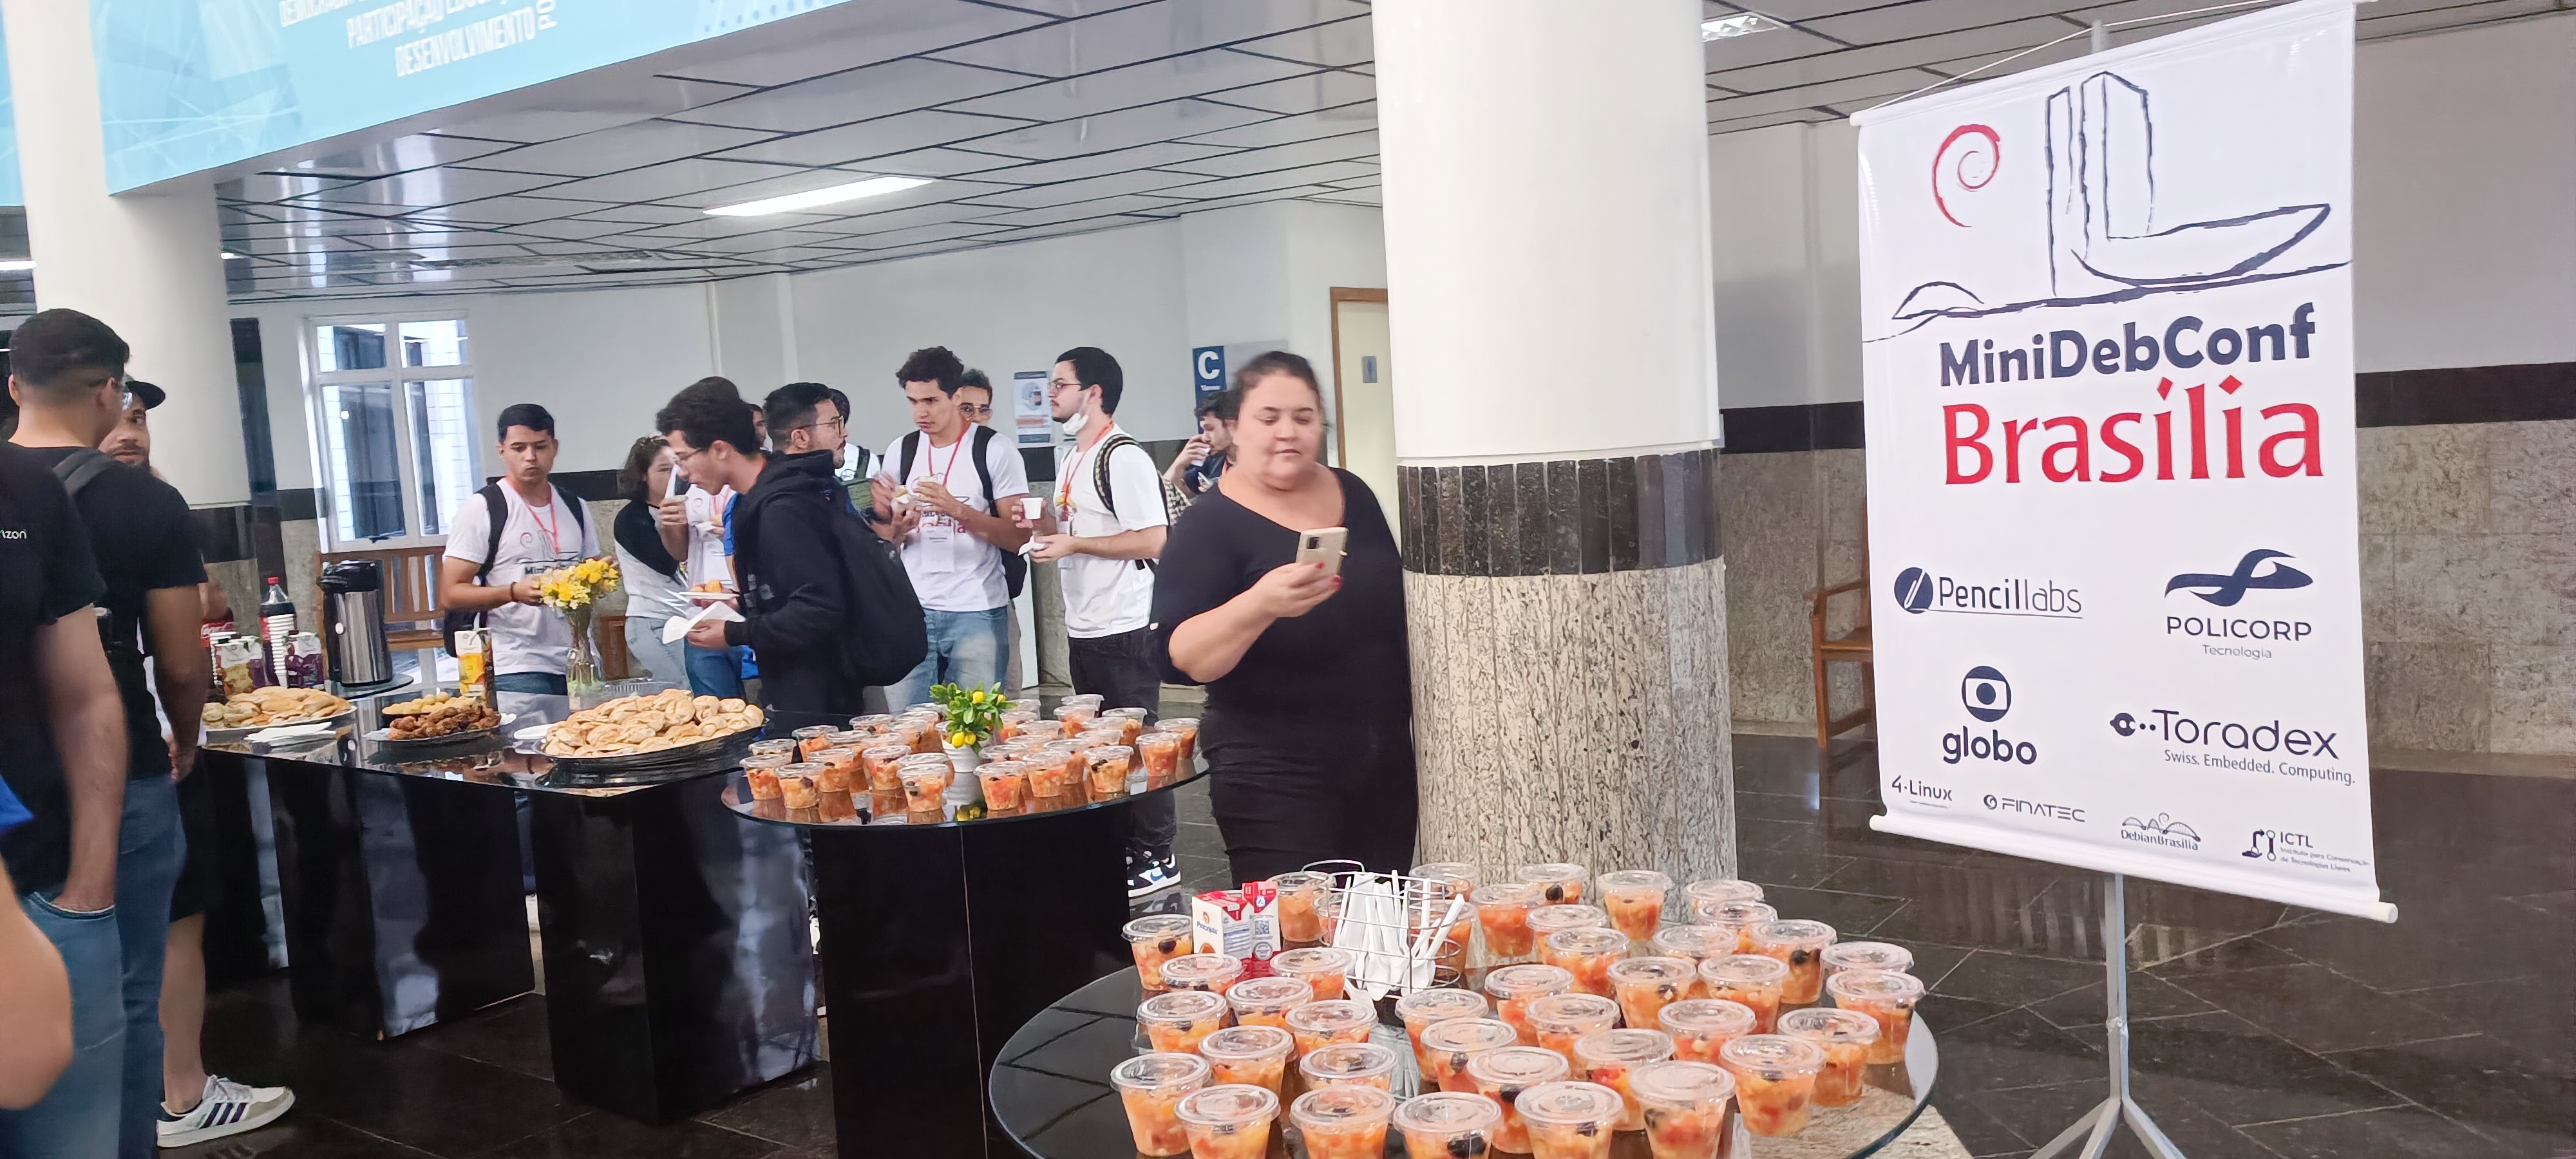
A MiniDebConf Bras lia 2023 foi um sucesso gra as participa o de todas e todos, independentemente do n vel de conhecimento sobre o Debian. Valorizamos a presen a tanto dos(as) usu rios(as) iniciantes que est o se familiarizando com o sistema quanto dos(as) desenvolvedores(as) oficiais do projeto. O esp rito de acolhimento e colabora o esteve presente em todos os momentos. As MiniDebConfs s o encontros locais organizados por membros do Projeto Debian, visando objetivos semelhantes aos da DebConf, por m em mbito regional. Ao longo do ano, eventos como esse ocorrem em diferentes partes do mundo, fortalecendo a comunidade Debian.
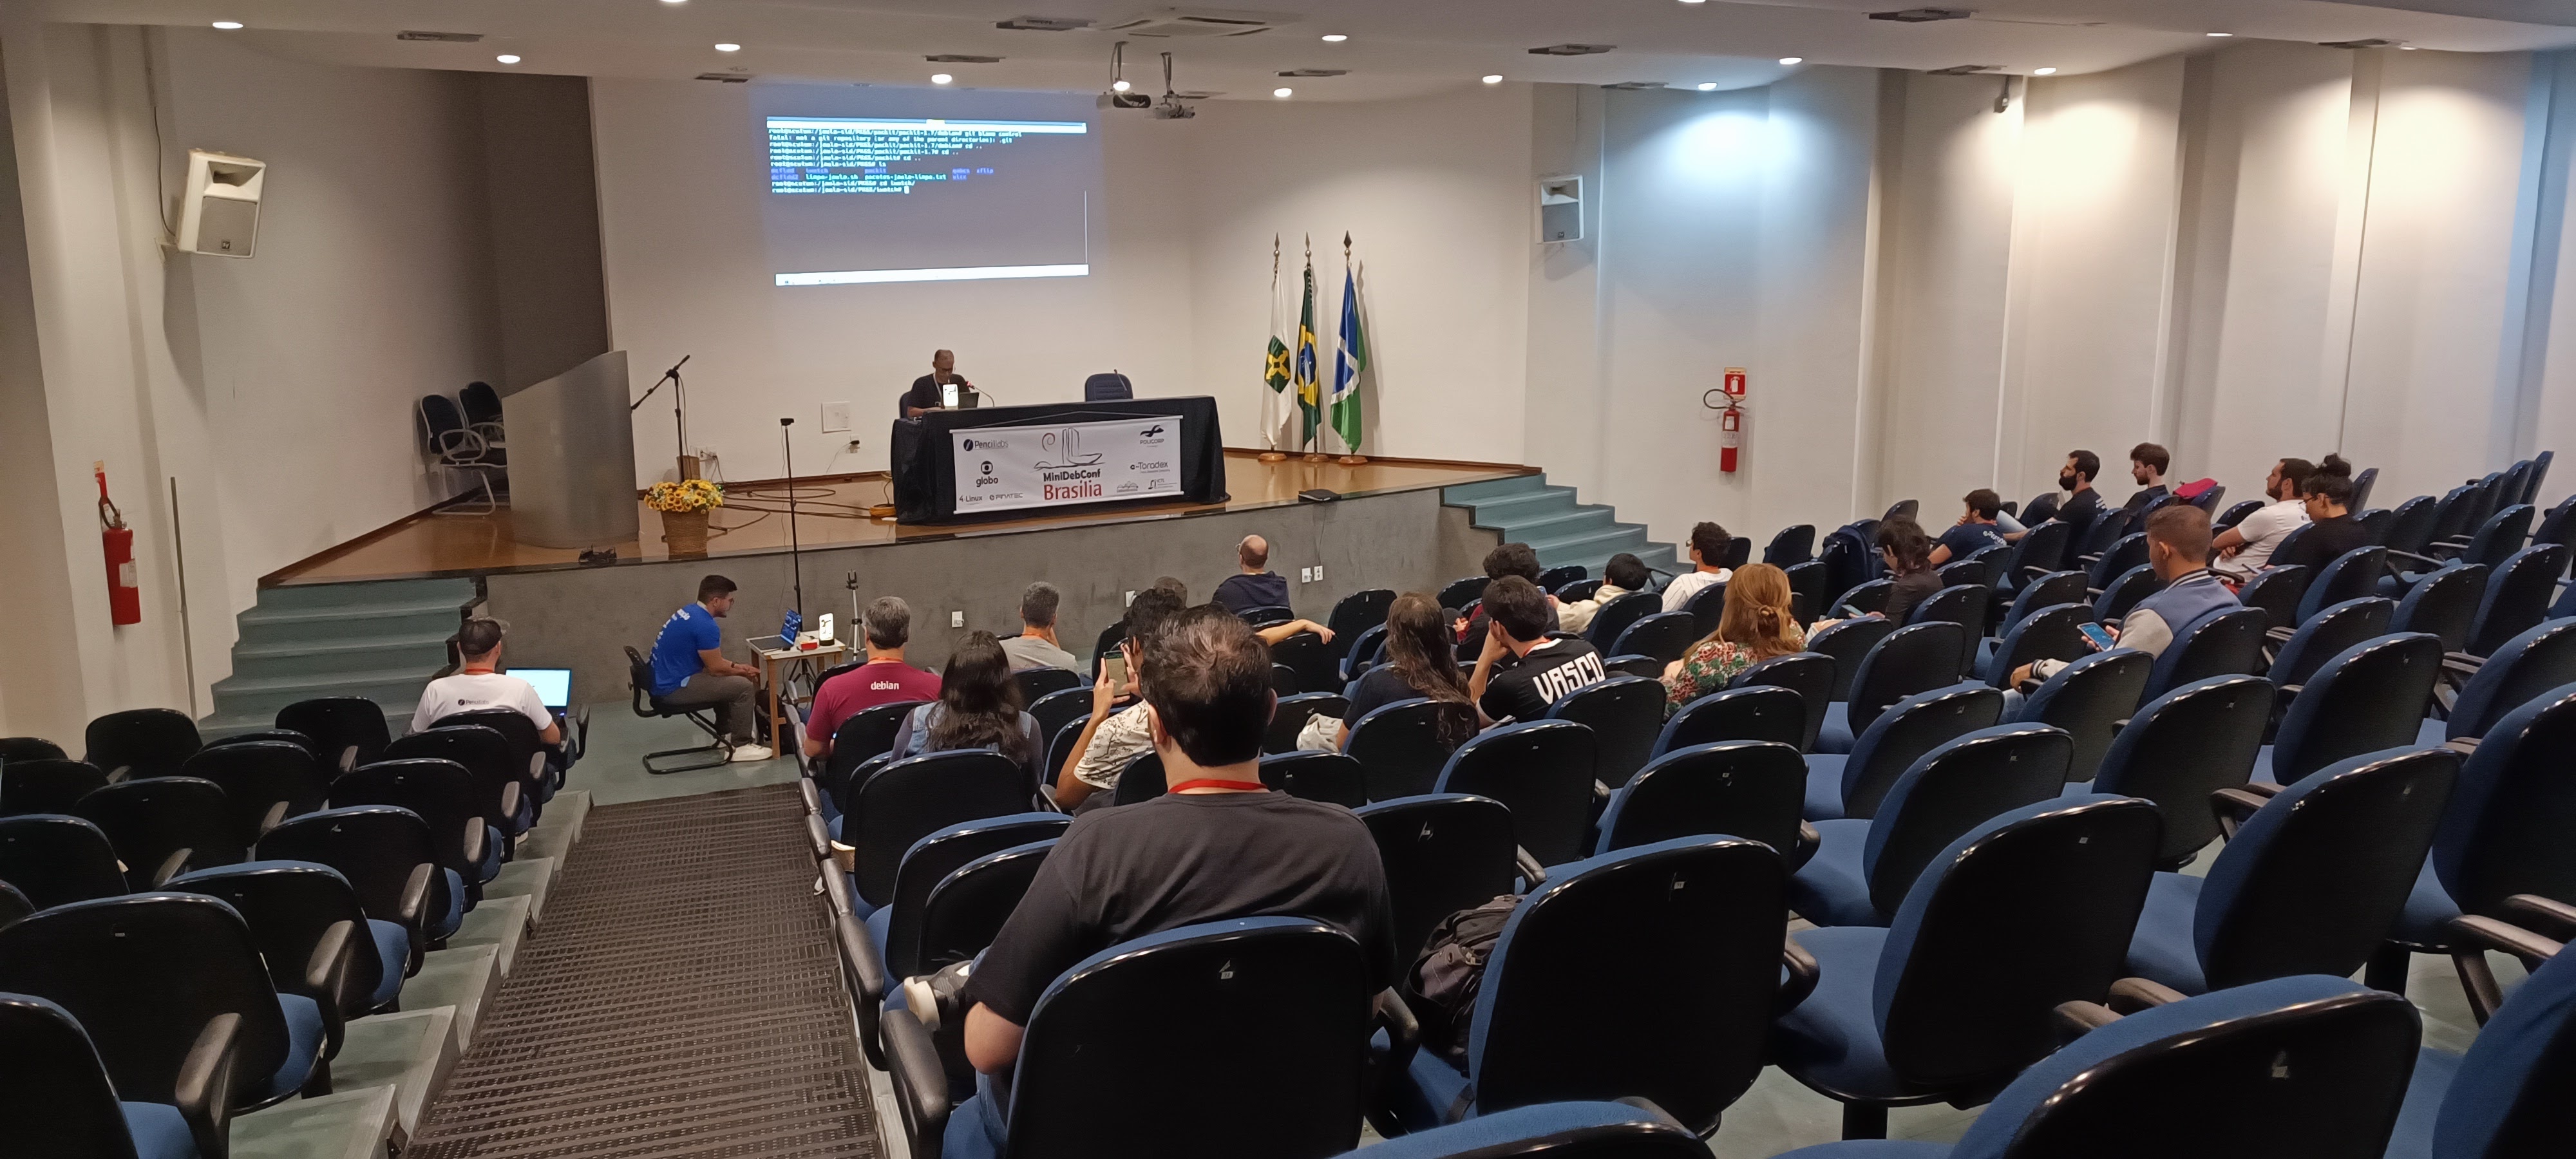
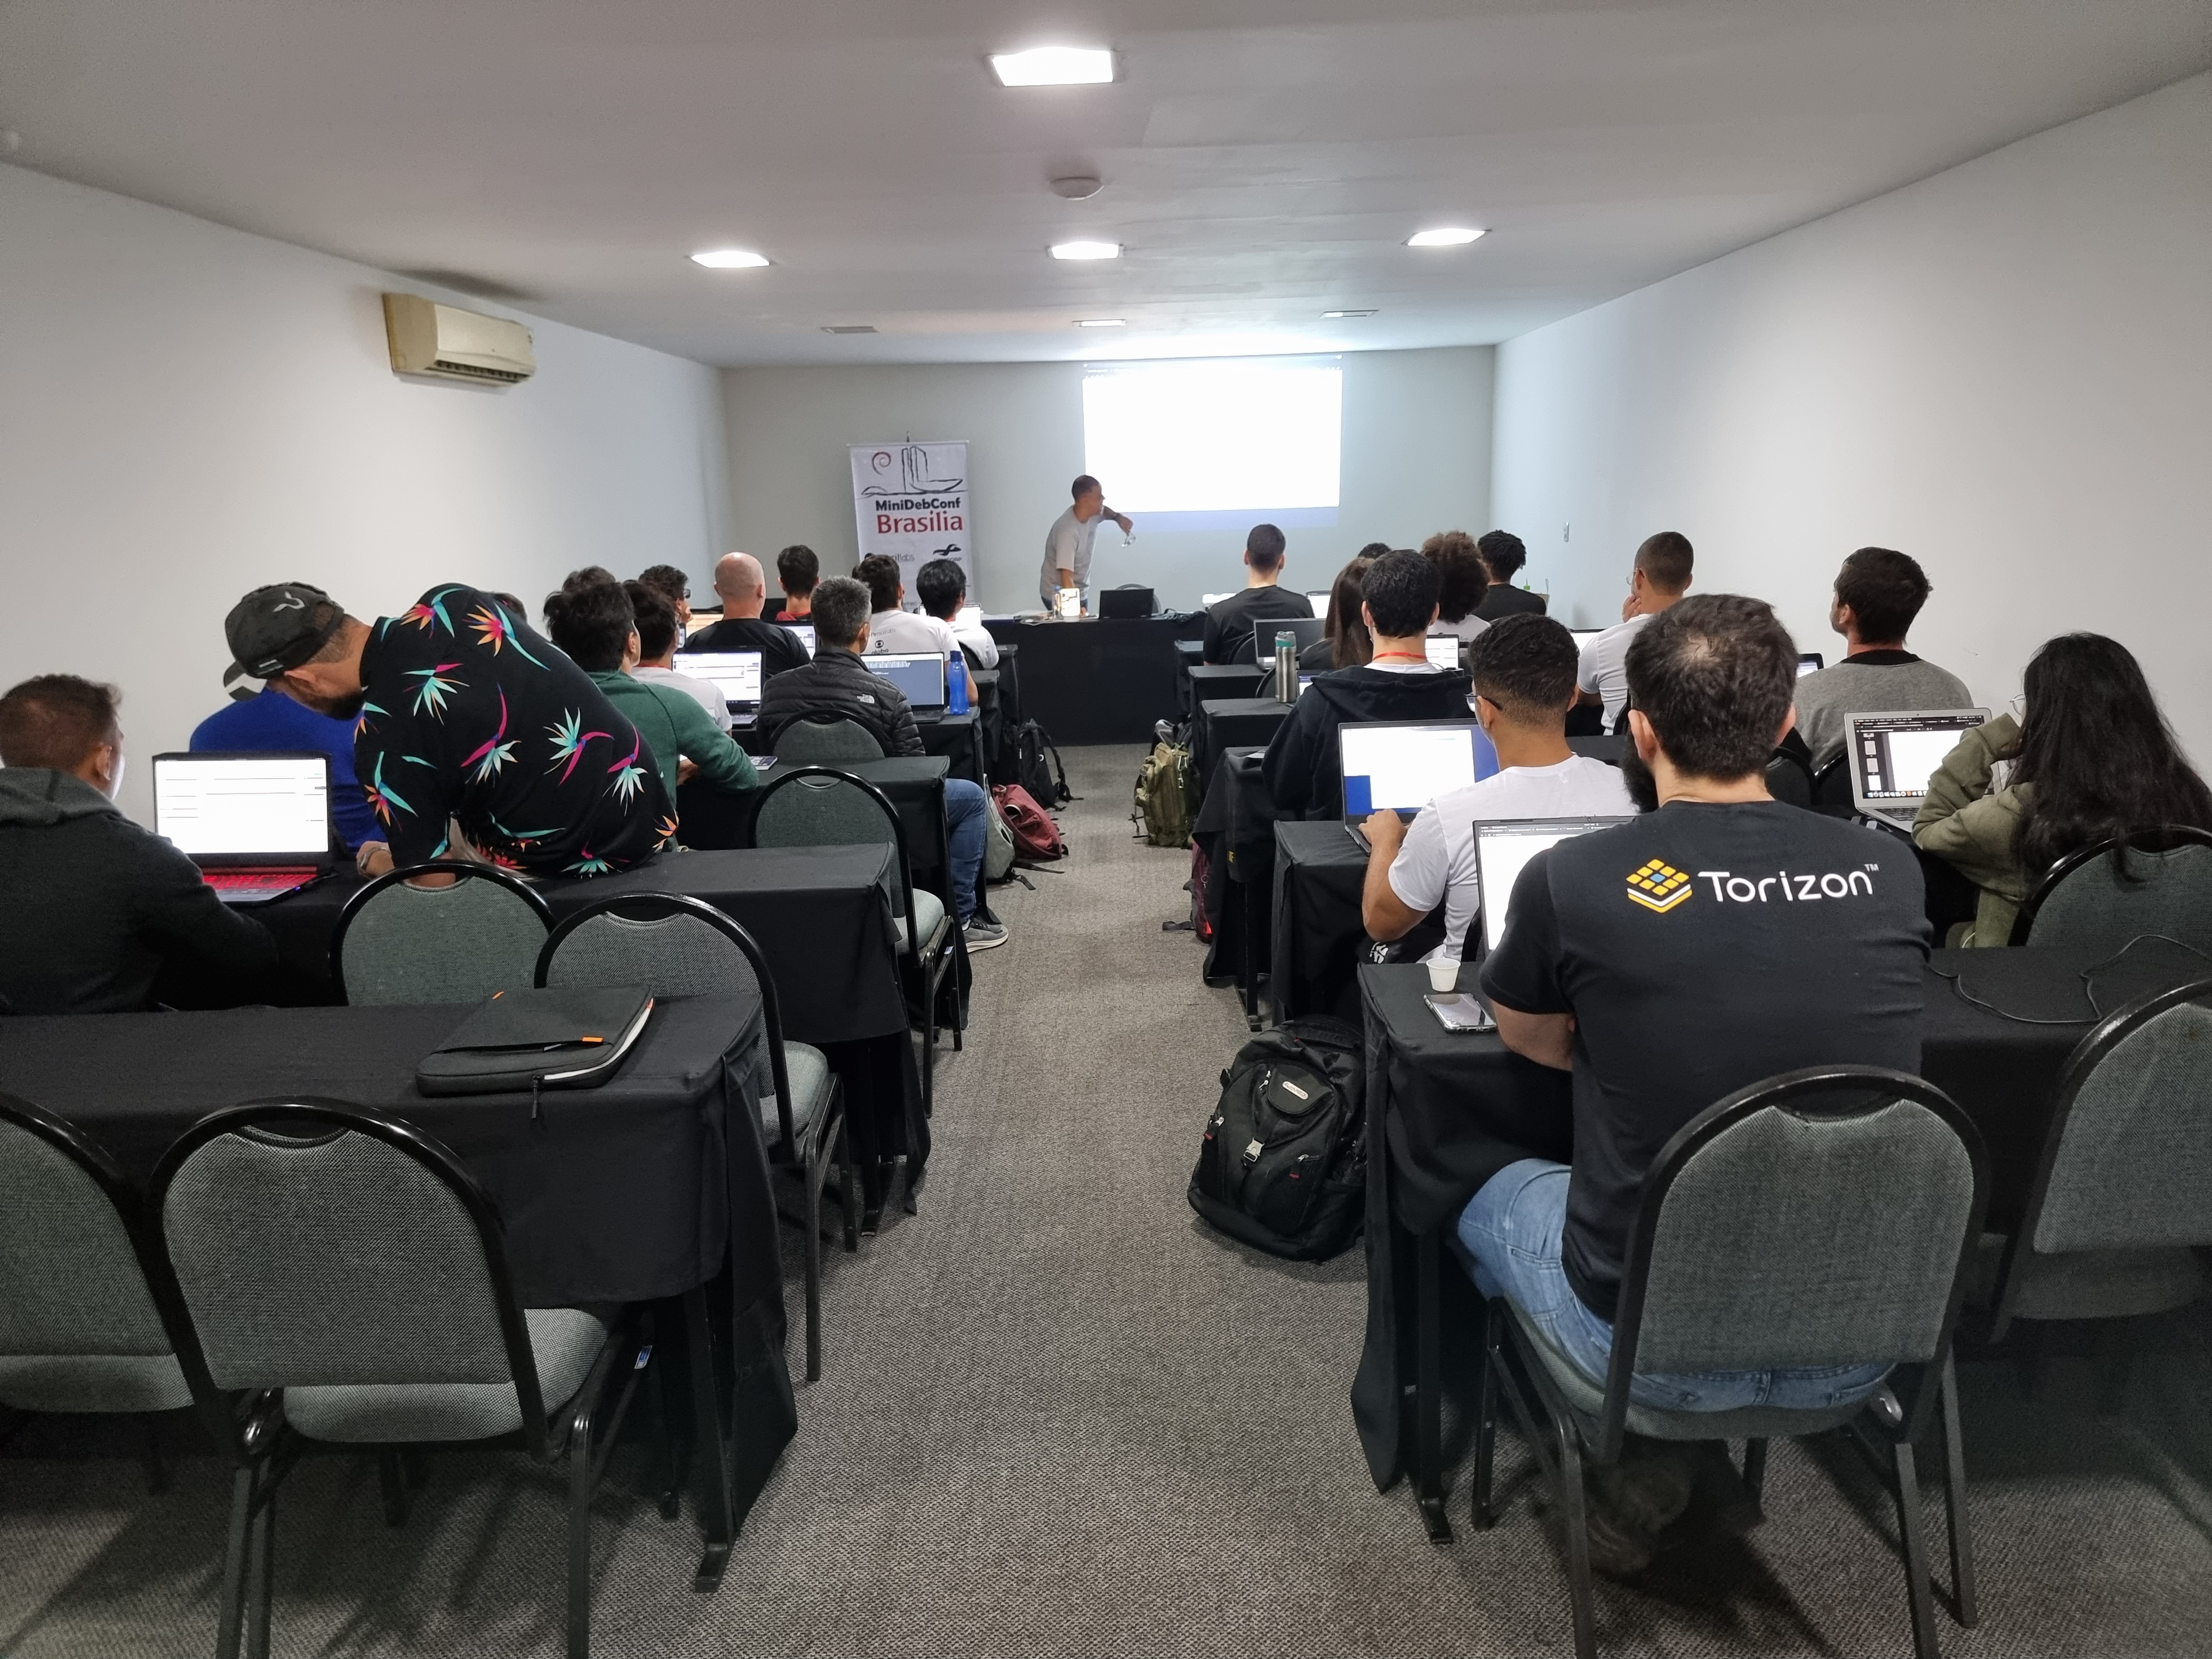
 Minidebconf2023 placa Atividades A programa o da MiniDebConf foi intensa e diversificada. Nos dias 25 e 26 (quinta e sexta-feira), tivemos palestras, debates, oficinas e muitas atividades pr ticas. J no dia 27 (s bado), ocorreu o Hacking Day, um momento especial em que os(as) colaboradores(as) do Debian se reuniram para trabalhar em conjunto em v rios aspectos do projeto. Essa foi a vers o brasileira da Debcamp, tradi o pr via DebConf. Nesse dia, priorizamos as atividades pr ticas de contribui o ao projeto, como empacotamento de softwares, tradu es, assinaturas de chaves, install fest e a Bug Squashing Party. Minidebconf2023 auditorio

Minidebconf2023 oficina N meros da edi o Os n meros do evento impressionam e demonstram o envolvimento da comunidade com o Debian. Tivemos 236 inscritos(as), 20 palestras submetidas, 14 volunt rios(as) e 125 check-ins realizados. Al m disso, nas atividades pr ticas, tivemos resultados significativos, como 7 novas instala es do Debian GNU/Linux, a atualiza o de 18 pacotes no reposit rio oficial do projeto Debian pelos participantes e a inclus o de 7 novos contribuidores na equipe de tradu o. Destacamos tamb m a participa o da comunidade de forma remota, por meio de transmiss es ao vivo. Os dados anal ticos revelam que nosso site obteve 7.058 visualiza es no total, com 2.079 visualiza es na p gina principal (que contava com o apoio de nossos patrocinadores), 3.042 visualiza es na p gina de programa o e 104 visualiza es na p gina de patrocinadores. Registramos 922 usu rios(as) nicos durante o evento. No YouTube, a transmiss o ao vivo alcan ou 311 visualiza es, com 56 curtidas e um pico de 20 visualiza es simult neas. Foram incr veis 85,1 horas de exibi o, e nosso canal conquistou 30 novos inscritos(as). Todo esse engajamento e interesse da comunidade fortalecem ainda mais a MiniDebConf. Minidebconf2023 palestrantes Fotos e v deos Para revivermos os melhores momentos do evento, temos dispon veis fotos e v deos. As fotos podem ser acessadas em: https://deb.li/pbsb2023. J os v deos com as grava es das palestras est o dispon veis no seguinte link: https://deb.li/vbsb2023. Para manter-se atualizado e conectar-se com a comunidade Debian Bras lia, siga-nos em nossas redes sociais: Agradecimentos Gostar amos de agradecer profundamente a todos(as) os(as) participantes, organizadores(as), patrocinadores e apoiadores(as) que contribu ram para o sucesso da MiniDebConf Bras lia 2023. Em especial, expressamos nossa gratid o aos patrocinadores Ouro: Pencillabs, Globo, Policorp e Toradex Brasil, e ao patrocinador Prata, 4-Linux. Tamb m agradecemos Finatec e ao Instituto para Conserva o de Tecnologias Livres (ICTL) pelo apoio. Minidebconf2023 coffee A MiniDebConf Bras lia 2023 foi um marco para a comunidade Debian, demonstrando o poder da colabora o e do Software Livre. Esperamos que todas e todos tenham desfrutado desse encontro enriquecedor e que continuem participando ativamente das pr ximas iniciativas do Projeto Debian. Juntos, podemos fazer a diferen a! Minidebconf2023 fotos oficial

30 June 2023

Shirish Agarwal: Motherboard battery, Framework, VR headsets, Steam

Motherboard Battery You know you have become too old when you get stumped and the solution is simple and fixed by the vendor. About a week back, I was getting CPU Fan Error. It s a 6 year old desktop so I figured that the fan or the ball bearings on the fan must have worn out. I opened up the cabinet and I could see both the on cpu fan was working coolly as well as the side fan was working without an issue. So I couldn t figure out what was the issue. I had updated the BIOS/UEFI number of years ago so that couldn t be an issue. I fiddled with the boot menu and was able to boot into Linux but it was a pain that I had to do every damn time. As it is, it takes almost 2-3 minutes for the whole desktop to be ready and this extra step was annoying. I had bought a Mid-tower cabinet while the motherboard so there were alternate connectors I could try but still the issue persisted. And this workaround was heart-breaking as you boot the BIOS/UEFI and fix the boot menu each time even though it had Debian Boot Launcher and couple of virtual ones provided by the vendor (Asus) and they were hardwired. So failing all, went to my vendor/support and asked if he could find out what the issue is. It costed me $10, he did all the same things I did but one thing more, he changed the battery (cost less than 1USD) and presto all was right with the world again. I felt like a fool but a deal is a deal so paid the gentleman for his services. Now can again use the desktop and at least know about what s happening in the outside world.

Framework Laptops I have been seeing quite a few teardowns of Framework Laptops on Youtube and love it. More so, now that they have AMD in their arsenal. I do hope they work on their pricing and logistics and soon we have it here competing with others. If the pricing isn t substantial then definitely would be one of the first ones to order. India is and remains a very cost-conscious market and more so with the runaway prices that we have been seeing. In fact, the last 3 years have been pretty bad for the overall PC market declining 30% YoY for the last 3 years while prices have gone through the roof. Apart from the pricing from the vendors, taxation has been another hit as the current Govt. has been taxing anywhere from 30-100% taxes on various PC, desktop and laptop components. Think have shared Graphic cards for instance have 100% Duty apart from other taxes. I don t see the market picking up at least in the 24 to 36 months. Most of this year and next year, both AMD and Intel are doing refreshes so while there would be some improvements (probably 10-15%) not earth-shattering for the wider market to sit up and take notice. Intel has proposed a 64-bit architecture (only) about couple of months back, more on that later. As far as the Indian market is concerned, if you want the masses, then have lappies at around 40-50k ($600 USD) and there would be a mass takeup, if you want to be a Lenovo or something like that, then around a lakh or INR 100k ($1200 USD) or be an Apple which is around 150k INR or around 2000 USD. There are some clues as to what their plans but for that you have to trawl their forums and the knowledgebase. Seems some people are using freight forwarders to get around the hurdles but Framework doesn t want to do any shortcuts for the same. Everybody seems to be working on Vertical stacking of chips, whether it is the Chinese, or Belgian s or even AMD and Intel who have their own spins to it, but most of these technologies are at least 3-4 years out in the future (or more). India is a big laggard in this space with having knowledge of 45nm which in Aviation speak one could say India knows how to build 707 (one of the first Boeing commercial passenger carrying aircraft) while today it is Boeing 777x or Airbus 350. I have shared in the past how the Tata s have been trying to collaborate with the Japanese and get at least their 25nm chip technology but nothing has come of it to date. The only somewhat o.k. news has been the chip testing and packaging plant by Micron to be made in Gujarat. It doesn t do anything for us although we would be footing almost 70% of the plant s capital expenditure and the maximum India will get 4k jobs. Most of these plants are highly automated as dust is their mortal enemy so even the 4k jobs announced seem far-fetched. It would probably be less than half once production starts if it happens  but that is probably a story for another time. Just as a parting shot, even memory vendors are going highly automated factory lines.

VR Headsets I was stuck by how similar or where VR is when I was watching Made in Finland. I don t want to delve much into the series but it is a fascinating one. I was very much taken by the character of Kari Kairamo or the actor who played the character of him and was very much disappointed with the sad ending the gentleman got. It is implicated in the series that the banks implicitly forced him to commit suicide. There is also a lot of chaos as is normal in a big company having many divisions. It s only when Jorma Olila takes over, the company sheds a lot of dead weight was cut off with mobiles having the most funding which they didn t have before. I was also fascinated when I experienced pride when Nokia shows off its 1011 mobile phone when at that time phones were actually like bricks. My first Nokia was number of years later, Nokia 1800 and have to say those phones outlasted a long time than today s Samsung s. If only Nokia had read the tea leaves right  Back to the topic though, I have been wearing glasses since the age of 5 year old. They weigh less than 10 grams and you still get a nose dent. And I know enough people, times etc. when people have got headaches and whatnot from glasses. Unless the VR headsets become that size and don t cost an arm and leg (or a kidney or a liver) it would have niche use. While 5G and 6G would certainly push more ppl to get it it probably would take a few more years before we have something that is simple and doesn t need too much to get it rolling. The series I mentioned above is already over it s first season but would highly recommend it. I do hope the second season happens quickly and we do come to know why and how Nokia missed the Android train and their curious turn to get to Microsoft which sorta sealed their fate

Steam I have been following Steam, Luthris and plenty of other launchers on Debian. There also seems to some sort of an idea that once MESA 23.1.x or later comes into Debian at some point we may get Steam 64-bit and some people are hopeful that we may get it by year-end. There are a plethora of statistics that can be used to find status of Gaming on Linux. This is perhaps the best one I got so far. Valve also has its own share of stats that it shows here. I am not going to go into much detail except the fact that lutris has been there on Debian sometime now. And as and when Steam does go fully 64-bit, whole lot of multilib issues could be finally put to rest. Interestingly, Intel has quietly also shared details of only a 64-bit architecture PC. From what I could tell, it simply boots into 16-bit and then goes into 64-bit bypassing the 32-bit. In theory, it should remove whole lot code, make it safer as well as faster. If rival AMD was to play along things could move much faster. Now don t get me wrong, 32-bit was good, but for it s time. I m sure at some point in time even 64-bit would have its demise, and we would jump to 128-bit. Of course, in reality we aren t anywhere close to even 48-bit, leave alone 64-bit. Superuser gives a good answer on that. We may be a decade or more before we exhaust that but for sure there will be need for better, faster hardware especially as we use more and more of AI for good and bad things. I am curious to see how it pans out and how it will affect (or not) FOSS gaming. FWIW, I used to peruse freegamer.blogspot.com which kinda ended in 2021 and now use Lee Reilly blog posts to know what is happening in github as far as FOSS games are concerned. There is also a whole thing about handhelds and gaming but that probably would require its own blog post or two. There are just too many while at the same time too few (legally purchasable in India) to have its own blog post, maybe sometime in Future. Best way to escape the world. Till later.

17 June 2023

John Goerzen: Using dar for Data Archiving

This is the third post in a series about data archiving to removable media (optical discs and hard drives). In the first, I explained the difference between backing up and archiving, established goals for the project, and said I d evaluate git-annex and dar. The second post evaluated git-annex, and now it s time to look at dar. The series will conclude with a post comparing git-annex with dar. What is dar? I could open with the same thing I did with git-annex, just changing the name of the program: [dar] is a fantastic and versatile program that does well, it s one of those things that can do so much that it s a bit hard to describe. It is, fundamentally, an archiver like tar or zip (makes one file representing a bunch of other files), but it goes far beyond that. dar s homepage lays out a comprehensive list of features, which I will try to summarize here. So to tie this together for this project, I will set up a 400MB slice size (to mimic what I did with git-annex), and see how dar saves the data and restores it. Isolated cataloges aren t strictly necessary for this, but by using them (and/or dar_manager), we can build up a database of files and locations and thus directly compare dar to git-annex location tracking. Walkthrough: Creating the first archive As with the git-annex walkthrough, I ll set some variables to make it easy to remember: OK, we can run the backup immediately. No special setup is needed. dar supports both short-form (single-character) parameters and long-form ones. Since the parameters probably aren t familiar to everyone, I will use the long-form ones in these examples. Here s how we create our initial full backup. I ll explain the parameters below:
$ dar \
--verbose \
--create $DRIVE/bak1 \
--on-fly-isolate $CATDIR/bak1 \
--slice 400M \
--min-digits 2 \
--pause \
--fs-root $SOURCEDIR
Let s look at each of these parameters: This same command could have been written with short options as:
$ dar -v -c $DRIVE/bak1 -@ $CATDIR/bak1 -s 400M -9 2 -p -R $SOURCEDIR
What does it look like while running? Here s an excerpt:
...
Adding file to archive: /acrypt/no-backup/jgoerzen/testdata/[redacted]
Finished writing to file 1, ready to continue ? [return = YES Esc = NO]
...
Writing down archive contents...
Closing the escape layer...
Writing down the first archive terminator...
Writing down archive trailer...
Writing down the second archive terminator...
Closing archive low layer...
Archive is closed.
--------------------------------------------
581 inode(s) saved
including 0 hard link(s) treated
0 inode(s) changed at the moment of the backup and could not be saved properly
0 byte(s) have been wasted in the archive to resave changing files
0 inode(s) with only metadata changed
0 inode(s) not saved (no inode/file change)
0 inode(s) failed to be saved (filesystem error)
0 inode(s) ignored (excluded by filters)
0 inode(s) recorded as deleted from reference backup
--------------------------------------------
Total number of inode(s) considered: 581
--------------------------------------------
EA saved for 0 inode(s)
FSA saved for 581 inode(s)
--------------------------------------------
Making room in memory (releasing memory used by archive of reference)...
Now performing on-fly isolation...
...
That was easy! Let s look at the contents of the backup directory:
$ ls -lh $DRIVE
total 3.7G
-rw-r--r-- 1 jgoerzen jgoerzen 400M Jun 16 19:27 bak1.01.dar
-rw-r--r-- 1 jgoerzen jgoerzen 400M Jun 16 19:27 bak1.02.dar
-rw-r--r-- 1 jgoerzen jgoerzen 400M Jun 16 19:27 bak1.03.dar
-rw-r--r-- 1 jgoerzen jgoerzen 400M Jun 16 19:27 bak1.04.dar
-rw-r--r-- 1 jgoerzen jgoerzen 400M Jun 16 19:28 bak1.05.dar
-rw-r--r-- 1 jgoerzen jgoerzen 400M Jun 16 19:28 bak1.06.dar
-rw-r--r-- 1 jgoerzen jgoerzen 400M Jun 16 19:28 bak1.07.dar
-rw-r--r-- 1 jgoerzen jgoerzen 400M Jun 16 19:28 bak1.08.dar
-rw-r--r-- 1 jgoerzen jgoerzen 400M Jun 16 19:29 bak1.09.dar
-rw-r--r-- 1 jgoerzen jgoerzen 156M Jun 16 19:33 bak1.10.dar
And the isolated catalog:
$ ls -lh $CATDIR
total 37K
-rw-r--r-- 1 jgoerzen jgoerzen 35K Jun 16 19:33 bak1.1.dar
The isolated catalog is stored compressed automatically. Well this was easy. With one command, we archived the entire data set, split into 400MB chunks, and wrote out the catalog data. Walkthrough: Inspecting the saved archive Can dar tell us which slice contains a given file? Sure:
$ dar --list $DRIVE/bak1 --list-format=slicing less
Slice(s) [Data ][D][ EA ][FSA][Compr][S] Permission Filemane
--------+--------------------------------+----------+-----------------------------
...
1 [Saved][ ] [-L-][ 0%][X] -rwxr--r-- [redacted]
1-2 [Saved][ ] [-L-][ 0%][X] -rwxr--r-- [redacted]
2 [Saved][ ] [-L-][ 0%][X] -rwxr--r-- [redacted]
...
This illustrates the transition from slice 1 to slice 2. The first file was stored entirely in slice 1; the second stored partially in slice 1 and partially in slice 2, and third solely in slice 2. We can get other kinds of information as well.
$ dar --list $DRIVE/bak1 less
[Data ][D][ EA ][FSA][Compr][S] Permission User Group Size Date filename
--------------------------------+------------+-------+-------+---------+-------------------------------+------------
[Saved][ ] [-L-][ 0%][X] -rwxr--r-- jgoerzen jgoerzen 24 Mio Mon Mar 5 07:58:09 2018 [redacted]
[Saved][ ] [-L-][ 0%][X] -rwxr--r-- jgoerzen jgoerzen 16 Mio Mon Mar 5 07:58:09 2018 [redacted]
[Saved][ ] [-L-][ 0%][X] -rwxr--r-- jgoerzen jgoerzen 22 Mio Mon Mar 5 07:58:09 2018 [redacted]
These are the same files I was looking at before. Here we see they are 24MB, 16MB, and 22MB in size, and some additional metadata. Even more is available in the XML list format. Walkthrough: updates As with git-annex, I ve made some changes in the source directory: moved a file, added another, and deleted one. Let s create an incremental backup now:
$ dar \
--verbose \
--create $DRIVE/bak2 \
--on-fly-isolate $CATDIR/bak2 \
--ref $CATDIR/bak1 \
--slice 400M \
--min-digits 2 \
--pause \
--fs-root $SOURCEDIR
This command is very similar to the earlier one. Instead of writing an archive and catalog named bak1, we write one named bak2. What s new here is --ref $CATDIR/bak1. That says, make an incremental based on an archive of reference. All that is needed from that archive of reference is the detached catalog. --ref $DRIVE/bak1 would have worked equally well here. Here s what I did to the $SOURCEDIR: Let s see if dar s command output matches this:
...
Adding file to archive: /acrypt/no-backup/jgoerzen/testdata/file01-unchanged
Saving Filesystem Specific Attributes for /acrypt/no-backup/jgoerzen/testdata/file01-unchanged
Adding file to archive: /acrypt/no-backup/jgoerzen/testdata/cp
Saving Filesystem Specific Attributes for /acrypt/no-backup/jgoerzen/testdata/cp
Adding folder to archive: [redacted]
Saving Filesystem Specific Attributes for [redacted]
Adding reference to files that have been destroyed since reference backup...
...
--------------------------------------------
3 inode(s) saved
including 0 hard link(s) treated
0 inode(s) changed at the moment of the backup and could not be saved properly
0 byte(s) have been wasted in the archive to resave changing files
0 inode(s) with only metadata changed
578 inode(s) not saved (no inode/file change)
0 inode(s) failed to be saved (filesystem error)
0 inode(s) ignored (excluded by filters)
2 inode(s) recorded as deleted from reference backup
--------------------------------------------
Total number of inode(s) considered: 583
--------------------------------------------
EA saved for 0 inode(s)
FSA saved for 3 inode(s)
--------------------------------------------
...
Yes, it does. The rename is recorded as a deletion and an addition, since dar doesn t directly track renames. So the rename plus the deletion account for the two deletions. The rename plus the addition of cp count as 2 of the 3 inodes saved; the third is the modified directory from which files were deleted and moved out. Let s see the files that were created:
$ ls -lh $DRIVE/bak2*
-rw-r--r-- 1 jgoerzen jgoerzen 18M Jun 16 19:52 /acrypt/no-backup/jgoerzen/dar-testing/drive/bak2.01.dar
$ ls -lh $CATDIR/bak2*
-rw-r--r-- 1 jgoerzen jgoerzen 22K Jun 16 19:52 /acrypt/no-backup/jgoerzen/dar-testing/cat/bak2.1.dar
What does list look like now?
Slice(s) [Data ][D][ EA ][FSA][Compr][S] Permission Filemane
--------+--------------------------------+----------+-----------------------------
[ ][ ] [---][-----][X] -rwxr--r-- [redacted]
1 [Saved][ ] [-L-][ 0%][X] -rwxr--r-- file01-unchanged
...
[--- REMOVED ENTRY ----][redacted]
[--- REMOVED ENTRY ----][redacted]
Here I show an example of:
  1. A file that was not changed from the initial backup. Its presence was simply noted, but because we re doing an incremental, the data wasn t saved.
  2. A file that is saved in this incremental, on slice 1.
  3. The two deleted files
Walkthrough: dar_manager As we ve seen above, the two archives (or their detached catalog) give us a complete picture of what files were present at the time of the creation of each archive, and what files were stored in a given archive. We can certainly continue working in that way. We can also use dar_manager to build a comprehensive database of these archives, to be able to find what media is necessary to restore each given file. Or, with dar_manager s when parameter, we can restore files as of a particular date. Let s try it out. First, we create our database:
$ dar_manager --create $DARDB
$ dar_manager --base $DARDB --add $DRIVE/bak1
Auto detecting min-digits to be 2
$ dar_manager --base $DARDB --add $DRIVE/bak2
Auto detecting min-digits to be 2
Here we created the database, and added our two catalogs to it. (Again, we could have as easily used $CATDIR/bak1; either the archive or its isolated catalog will work here.) It s important to add the catalogs in order. Let s do some quick experimentation with dar_manager:
$ dar_manager -v --base $DARDB --list
Decompressing and loading database to memory...
dar path :
dar options :
database version : 6
compression used : gzip
compression level: 9 archive # path basename
------------+--------------+---------------
1 /acrypt/no-backup/jgoerzen/dar-testing/drive bak1
2 /acrypt/no-backup/jgoerzen/dar-testing/drive bak2
$ dar_manager --base $DARDB --stat
archive # most recent/total data most recent/total EA
--------------+-------------------------+-----------------------
1 580/581 0/0
2 3/3 0/0
The list option shows the correlation between dar_manager archive number (1, 2) with filenames (bak1, bak2). It is coincidence here that 1/bak1 and 2/bak2 correlate; that s not necessarily the case. Most dar_manager commands operate on archive number, while dar commands operate on archive path/basename. Now let s see just what files are saved in archive , the incremental:
$ dar_manager --base $DARDB --used 2
[ Saved ][ ] [redacted]
[ Saved ][ ] file01-unchanged
[ Saved ][ ] cp
Now we can also where a file is stored. Here s one that was saved in the full backup and unmodified in the incremental:
$ dar_manager --base $DARDB --file [redacted]
1 Fri Jun 16 19:15:12 2023 saved absent
2 Fri Jun 16 19:15:12 2023 present absent
(The absent at the end refers to extended attributes that the file didn t have) Similarly, for files that were added or removed, they ll be listed only at the appropriate place. Walkthrough: Restoration I m not going to repeat the author s full restoration with dar page, but here are some quick examples. A simple way of doing everything is using incrementals for the whole series. To do that, you d have bak1 be full, bak2 based on bak1, bak3 based on bak2, bak4 based on bak3, etc. To restore from such a series, you have two options: If you get fancy for instance, bak2 is based on bak1, bak3 on bak2, bak4 on bak1 then you would want to use dar_manager to ensure a consistent restore is completed. Either way, the process is nearly identical. Also, I figure, to make things easy, you can save a copy of the entire set of isolated catalogs before you finalize each disc/drive. They re so small, and this would let someone with just the most recent disc build a dar_manager database without having to go through all the other discs. Anyhow, let s do a restore using just dar. I ll make a $RESTOREDIR and do it that way.
$ dar \
--verbose \
--extract $DRIVE/bak1 \
--fs-root $RESTOREDIR \
--no-warn \
--execute "echo Ready for slice %n. Press Enter; read foo"
This execute lets us see how dar works; this is an illustration of the power it has (above pause); it s a snippet interpreted by /bin/sh with %n being one of the dar placeholders. If memory serves, it s not strictly necessary, as dar will prompt you for slices it needs if they re not mounted. Anyhow, you ll see it first reading the last slice, which contains the catalog, then reading from the beginning. Here we go:
Auto detecting min-digits to be 2
Opening archive bak1 ...
Opening the archive using the multi-slice abstraction layer...
Ready for slice 10. Press Enter
...
Loading catalogue into memory...
Locating archive contents...
Reading archive contents...
File ownership will not be restored du to the lack of privilege, you can disable this message by asking not to restore file ownership [return = YES Esc = NO]
Continuing...
Restoring file's data: [redacted]
Restoring file's FSA: [redacted]
Ready for slice 1. Press Enter
...
Ready for slice 2. Press Enter
...
--------------------------------------------
581 inode(s) restored
including 0 hard link(s)
0 inode(s) not restored (not saved in archive)
0 inode(s) not restored (overwriting policy decision)
0 inode(s) ignored (excluded by filters)
0 inode(s) failed to restore (filesystem error)
0 inode(s) deleted
--------------------------------------------
Total number of inode(s) considered: 581
--------------------------------------------
EA restored for 0 inode(s)
FSA restored for 0 inode(s)
--------------------------------------------
The warning is because I m not doing the extraction as root, which limits dar s ability to fully restore ownership data. OK, now the incremental:
$ dar \
--verbose \
--extract $DRIVE/bak2 \
--fs-root $RESTOREDIR \
--no-warn \
--execute "echo Ready for slice %n. Press Enter; read foo"
...
Ready for slice 1. Press Enter
...
Restoring file's data: /acrypt/no-backup/jgoerzen/dar-testing/restore/file01-unchanged
Restoring file's FSA: /acrypt/no-backup/jgoerzen/dar-testing/restore/file01-unchanged
Restoring file's data: /acrypt/no-backup/jgoerzen/dar-testing/restore/cp
Restoring file's FSA: /acrypt/no-backup/jgoerzen/dar-testing/restore/cp
Restoring file's data: /acrypt/no-backup/jgoerzen/dar-testing/restore/[redacted directory]
Removing file (reason is file recorded as removed in archive): [redacted file]
This all looks right! Now how about we compare the restore to the original source directory?
$ diff -durN $SOURCEDIR $RESTOREDIR
No changes perfect. We could instead do this restore via a single dar_manager command, though annoyingly, we d have to pass all top-level files/directories to dar_manager restore. But still, it s one command, and basically automates and optimizes the dar restores shown above. Conclusions Dar makes it extremely easy to just Do The Right Thing when making archives. One command makes a backup. It saves things in simple files. You can make an isolated catalog if you want, and it too is saved in a simple file. You can query what is in the files and where. You can restore from all or part of the files. You can simply play the backups forward, in order, to achieve a full and consistent restore. Or you can load data about them into dar_manager for an optimized restore. A bit of scripting will be necessary to make incrementals; finding the most recent backup or catalog. If backup files are named with care for instance, by date then this should be a pretty easy task. I haven t touched on resiliency yet. dar comes with tools for recovering archives that have had portions corrupted or lost. It can also rebuild the catalog if it is corrupted or lost. It adds tape marks (or escape sequences ) to the archive along with the data stream. So every entry in the catalog is actually stored in the archive twice: once alongside the file data, and once at the end in the collected catalog. This allows dar to scan a corrupted file for the tape marks and reconstruct whatever is still intact, even if the catalog is lost. dar also integrates with tools like sha256sum and par2 to simplify archive integrity testing and restoration. This balances against the need to use a tool (dar, optionally with a GUI frontend) to restore files. I ll discuss that more in the next post.

16 June 2023

John Goerzen: Using git-annex for Data Archiving

In my recent post about data archiving to removable media, I laid out the difference between backing up and archiving, and also said I d evaluate git-annex and dar. This post evaluates git-annex. The next will look at dar, and then I ll make a comparison post. What is git-annex? git-annex is a fantastic and versatile program that does well, it s one of those things that can do so much that it s a bit hard to describe. Its homepage says:
git-annex allows managing large files with git, without storing the file contents in git. It can sync, backup, and archive your data, offline and online. Checksums and encryption keep your data safe and secure. Bring the power and distributed nature of git to bear on your large files with git-annex.
I think the particularly interesting features of git-annex aren t actually included in that list. Among the features of git-annex that make it shine for this purpose, its location tracking is key. git-annex can know exactly which device has which file at which version at all times. Combined with its preferred content settings, this lets you very easily say things like: git-annex can be set to allow a configurable amount of free space to remain on a device, and it will fill it up with whatever copies are necessary up until it hits that limit. Very convenient! git-annex will store files in a folder structure that mirrors the origin folder structure, in plain files just as they were. This maximizes the ability for a future person to access the content, since it is all viewable without any special tool at all. Of course, for things like optical media, git-annex will essentially be creating what amounts to incrementals. To obtain a consistent copy of the original tree, you would still need to use git-annex to process (export) the archives. git-annex challenges In my prior post, I related some challenges with git-annex. The biggest of them quite poor performance of the directory special remote when dealing with many files has been resolved by Joey, git-annex s author! That dramatically improves the git-annex use scenario here! The fixing commit is in the source tree but not yet in a release. git-annex no doubt may still have performance challenges with repositories in the 100,000+-range, but in that order of magnitude it now looks usable. I m not sure about 1,000,000-file repositories (I haven t tested); there is a page about scalability. A few other more minor challenges remain: I worked around the timestamp issue by using the mtree-netbsd package in Debian. mtree writes out a summary of files and metadata in a tree, and can restore them. To save: mtree -c -R nlink,uid,gid,mode -p /PATH/TO/REPO -X <(echo './.git') > /tmp/spec And, after restoration, the timestamps can be applied with: mtree -t -U -e < /tmp/spec Walkthrough: initial setup To use git-annex in this way, we have to do some setup. My general approach is this: Let's get started! I've set all these shell variables appropriately for this example, and REPONAME to "testdata". We'll begin by setting up the metadata-only tracking repo.
$ REPONAME=testdata
$ mkdir "$METAREPO"
$ cd "$METAREPO"
$ git init
$ git config annex.thin true
There is a sort of complicated topic of how git-annex stores files in a repo, which varies depending on whether the data for the file is present in a given repo, and whether the file is locked or unlocked. Basically, the options I use here cause git-annex to mostly use hard links instead of symlinks or pointer files, for maximum compatibility with non-POSIX filesystems such as NTFS and UDF, which might be used on these devices. thin is part of that. Let's continue:
$ git annex init 'local hub'
init local hub ok
(recording state in git...)
$ git annex wanted . "include=* and exclude=$REPONAME/*"
wanted . ok
(recording state in git...)
In a bit, we are going to import the source data under the directory named $REPONAME (here, testdata). The wanted command says: in this repository (represented by the bare dot), the files we want are matched by the rule that says eveyrthing except what's under $REPONAME. In other words, we don't want to make an unnecessary copy here. Because I expect to use an mtree file as documented above, and it is not under $REPONAME/, it will be included. Let's just add it and tweak some things.
$ touch mtree
$ git annex add mtree
add mtree
ok
(recording state in git...)
$ git annex sync
git-annex sync will change default behavior to operate on --content in a future version of git-annex. Recommend you explicitly use --no-content (or -g) to prepare for that change. (Or you can configure annex.synccontent)
commit
[main (root-commit) 6044742] git-annex in local hub
1 file changed, 1 insertion(+)
create mode 120000 mtree
ok
$ ls -l
total 9
lrwxrwxrwx 1 jgoerzen jgoerzen 178 Jun 15 22:31 mtree -> .git/annex/objects/pX/ZJ/...
OK! We've added a file, and it got transformed into a symlink. That's the thing I said we were going to avoid, so:
git annex adjust --unlock-present
adjust
Switched to branch 'adjusted/main(unlockpresent)'
ok
$ ls -l
total 1
-rw-r--r-- 2 jgoerzen jgoerzen 0 Jun 15 22:31 mtree
You'll notice it transformed into a hard link (nlinks=2) file. Great! Now let's import the source data. For that, we'll use the directory special remote.
$ git annex initremote source type=directory directory=$SOURCEDIR importtree=yes \
encryption=none
initremote source ok
(recording state in git...)
$ git annex enableremote source directory=$SOURCEDIR
enableremote source ok
(recording state in git...)
$ git config remote.source.annex-readonly true
$ git config annex.securehashesonly true
$ git config annex.genmetadata true
$ git config annex.diskreserve 100M
$ git config remote.source.annex-tracking-branch main:$REPONAME
OK, so here we created a new remote named "source". We enabled it, and set some configuration. Most notably, that last line causes files from "source" to be imported under $REPONAME/ as we wanted earlier. Now we're ready to scan the source.
$ git annex sync
At this point, you'll see git-annex computing a hash for every file in the source directory. I can verify with du that my metadata-only repo only uses 14MB of disk space, while my source is around 4GB. Now we can see what git-annex thinks about file locations:
$ git-annex whereis less
whereis mtree (1 copy)
8aed01c5-da30-46c0-8357-1e8a94f67ed6 -- local hub [here]
ok
whereis testdata/[redacted] (0 copies)
The following untrusted locations may also have copies:
9e48387e-b096-400a-8555-a3caf5b70a64 -- [source]
failed
... many more lines ...
So remember we said we wanted mtree, but nothing under testdata, under this repo? That's exactly what we got. git-annex knows that the files under testdata can be found under the "source" special remote, but aren't in any git-annex repo -- yet. Now we'll start adding them. Walkthrough: removable drives I've set up two 500MB filesystems to represent removable drives. We'll see how git-annex works with them.
$ cd $DRIVE01
$ df -h .
Filesystem Size Used Avail Use% Mounted on
acrypt/no-backup/annexdrive01 500M 1.0M 499M 1% /acrypt/no-backup/annexdrive01
$ git clone $METAREPO
Cloning into 'testdata'...
done.
$ cd $REPONAME
$ git config annex.thin true
$ git annex init "test drive #1"
$ git annex adjust --hide-missing --unlock
adjust
Switched to branch 'adjusted/main(hidemissing-unlocked)'
ok
$ git annex sync
OK, that's the initial setup. Now let's enable the source remote and configure it the same way we did before:
$ git annex enableremote source directory=$SOURCEDIR
enableremote source ok
(recording state in git...)
$ git config remote.source.annex-readonly true
$ git config remote.source.annex-tracking-branch main:$REPONAME
$ git config annex.securehashesonly true
$ git config annex.genmetadata true
$ git config annex.diskreserve 100M
Now, we'll add the drive to a group called "driveset01" and configure what we want on it:
$ git annex group . driveset01
$ git annex wanted . '(not copies=driveset01:1)'
What this does is say: first of all, this drive is in a group named driveset01. Then, this drive wants any files for which there isn't already at least one copy in driveset01. Now let's load up some files!
$ git annex sync --content
As the messages fly by from here, you'll see it mentioning that it got mtree, and then various files from "source" -- until, that is, the filesystem had less than 100MB free, at which point it complained of no space for the rest. Exactly like we wanted! Now, we need to teach $METAREPO about $DRIVE01.
$ cd $METAREPO
$ git remote add drive01 $DRIVE01/$REPONAME
$ git annex sync drive01
git-annex sync will change default behavior to operate on --content in a future version of git-annex. Recommend you explicitly use --no-content (or -g) to prepare for that change. (Or you can configure annex.synccontent)
commit
On branch adjusted/main(unlockpresent)
nothing to commit, working tree clean
ok
merge synced/main (Merging into main...)
Updating d1d9e53..817befc
Fast-forward
(Merging into adjusted branch...)
Updating 7ccc20b..861aa60
Fast-forward
ok
pull drive01
remote: Enumerating objects: 214, done.
remote: Counting objects: 100% (214/214), done.
remote: Compressing objects: 100% (95/95), done.
remote: Total 110 (delta 6), reused 0 (delta 0), pack-reused 0
Receiving objects: 100% (110/110), 13.01 KiB 1.44 MiB/s, done.
Resolving deltas: 100% (6/6), completed with 6 local objects.
From /acrypt/no-backup/annexdrive01/testdata
* [new branch] adjusted/main(hidemissing-unlocked) -> drive01/adjusted/main(hidemissing-unlocked)
* [new branch] adjusted/main(unlockpresent) -> drive01/adjusted/main(unlockpresent)
* [new branch] git-annex -> drive01/git-annex
* [new branch] main -> drive01/main
* [new branch] synced/main -> drive01/synced/main
ok
OK! This step is important, because drive01 and drive02 (which we'll set up shortly) won't necessarily be able to reach each other directly, due to not being plugged in simultaneously. Our $METAREPO, however, will know all about where every file is, so that the "wanted" settings can be correctly resolved. Let's see what things look like now:
$ git annex whereis less
whereis mtree (2 copies)
8aed01c5-da30-46c0-8357-1e8a94f67ed6 -- local hub [here]
b46fc85c-c68e-4093-a66e-19dc99a7d5e7 -- test drive #1 [drive01]
ok
whereis testdata/[redacted] (1 copy)
b46fc85c-c68e-4093-a66e-19dc99a7d5e7 -- test drive #1 [drive01]
The following untrusted locations may also have copies:
9e48387e-b096-400a-8555-a3caf5b70a64 -- [source]
ok
If I scroll down a bit, I'll see the files past the 400MB mark that didn't make it onto drive01. Let's add another example drive! Walkthrough: Adding a second drive The steps for $DRIVE02 are the same as we did before, just with drive02 instead of drive01, so I'll omit listing it all a second time. Now look at this excerpt from whereis:
whereis testdata/[redacted] (1 copy)
b46fc85c-c68e-4093-a66e-19dc99a7d5e7 -- test drive #1 [drive01]
The following untrusted locations may also have copies:
9e48387e-b096-400a-8555-a3caf5b70a64 -- [source]
ok
whereis testdata/[redacted] (1 copy)
c4540343-e3b5-4148-af46-3f612adda506 -- test drive #2 [drive02]
The following untrusted locations may also have copies:
9e48387e-b096-400a-8555-a3caf5b70a64 -- [source]
ok
Look at that! Some files on drive01, some on drive02, some neither place. Perfect! Walkthrough: Updates So I've made some changes in the source directory: moved a file, added another, and deleted one. All of these were copied to drive01 above. How do we handle this? First, we update the metadata repo:
$ cd $METAREPO
$ git annex sync
$ git annex dropunused all
OK, this has scanned $SOURCEDIR and noted changes. Let's see what whereis says:
$ git annex whereis less
...
whereis testdata/cp (0 copies)
The following untrusted locations may also have copies:
9e48387e-b096-400a-8555-a3caf5b70a64 -- [source]
failed
whereis testdata/file01-unchanged (1 copy)
b46fc85c-c68e-4093-a66e-19dc99a7d5e7 -- test drive #1 [drive01]
The following untrusted locations may also have copies:
9e48387e-b096-400a-8555-a3caf5b70a64 -- [source]
ok
So this looks right. The file I added was a copy of /bin/cp. I moved another file to one named file01-unchanged. Notice that it realized this was a rename and that the data still exists on drive01. Well, let's update drive01.
$ cd $DRIVE01/$REPONAME
$ git annex sync --content
Looking at the testdata/ directory now, I see that file01-unchanged has been renamed, the deleted file is gone, but cp isn't yet here -- probably due to space issues; as it's new, it's undefined whether it or some other file would fill up free space. Let's work along a few more commands.
$ git annex get --auto
$ git annex drop --auto
$ git annex dropunused all
And now, let's make sure metarepo is updated with its state.
$ cd $METAREPO
$ git annex sync
We could do the same for drive02. This is how we would proceed with every update. Walkthrough: Restoration Now, we have bare files at reasonable locations in drive01 and drive02. But, to generate a consistent restore, we need to be able to actually do an export. Otherwise, we may have files with old names, duplicate files, etc. Let's assume that we lost our source and metadata repos and have to restore from scratch. We'll make a new $RESTOREDIR. We'll begin with drive01 since we used it most recently.
$ mv $METAREPO $METAREPO.disabled
$ mv $SOURCEDIR $SOURCEDIR.disabled
$ git clone $DRIVE01/$REPONAME $RESTOREDIR
$ cd $RESTOREDIR
$ git config annex.thin true
$ git annex init "restore"
$ git annex adjust --hide-missing --unlock
Now, we need to connect the drive01 and pull the files from it.
$ git remote add drive01 $DRIVE01/$REPONAME
$ git annex sync --content
Now, repeat with drive02:
$ git remote add drive02 $DRIVE02/$REPONAME
$ git annex sync --content
Now we've got all our content back! Here's what whereis looks like:
whereis testdata/file01-unchanged (3 copies)
3d663d0f-1a69-4943-8eb1-f4fe22dc4349 -- restore [here]
9e48387e-b096-400a-8555-a3caf5b70a64 -- source
b46fc85c-c68e-4093-a66e-19dc99a7d5e7 -- test drive #1 [origin]
ok
...
I was a little surprised that drive01 didn't seem to know what was on drive02. Perhaps that could have been remedied by adding more remotes there? I'm not entirely sure; I'd thought would have been able to do that automatically. Conclusions I think I have demonstrated two things: First, git-annex is indeed an extremely powerful tool. I have only scratched the surface here. The location tracking is a neat feature, and being able to just access the data as plain files if all else fails is nice for future users. Secondly, it is also a complex tool and difficult to get right for this purpose (I think much easier for some other purposes). For someone that doesn't live and breathe git-annex, it can be hard to get right. In fact, I'm not entirely sure I got it right here. Why didn't drive02 know what files were on drive01 and vice-versa? I don't know, and that reflects some kind of misunderstanding on my part about how metadata is synced; perhaps more care needs to be taken in restore, or done in a different order, than I proposed. I initially tried to do a restore by using git annex export to a directory special remote with exporttree=yes, but I couldn't ever get it to actually do anything, and I don't know why. These two cut against each other. On the one hand, the raw accessibility of the data to someone with no computer skills is unmatched. On the other hand, I'm not certain I have the skill to always prepare the discs properly, or to do a proper consistent restore.

12 June 2023

Matthew Palmer: Private Key Redaction: Redux

[Note: the original version of this post named the author of the referenced blog post, and the tone of my writing could be construed to be mocking or otherwise belittling them. While that was not my intention, I recognise that was a possible interpretation, and I have revised this post to remove identifying information and try to neutralise the tone. On the other hand, I have kept the identifying details of the domain involved, as there are entirely legitimate security concerns that result from the issues discussed in this post.] I have spoken before about why it is tricky to redact private keys. Although that post demonstrated a real-world, presumably-used-in-the-wild private key, I ve been made aware of commentary along the lines of this representative sample:
I find it hard to believe that anyone would take their actual production key and redact it for documentation. Does the author have evidence of this in practice, or did they see example keys and assume they were redacted production keys?
Well, buckle up, because today s post is another real-world case study, with rather higher stakes than the previous example.

When Helping Hurts Today s case study begins with someone who attempted to do a very good thing: they wrote a blog post about using HashiCorp Vault to store certificates and their private keys. In his post, they included some test data, a certificate and a private key, which they redacted. Unfortunately, they did not redact these very well. Each base64 blob has had one line replaced with all xs. Based on the steps I explained previously, it is relatively straightforward to retrieve the entire, intact private key.

From Bad to OMFG Now, if this post author had, say, generated a fresh private key (after all, there s no shortage of possible keys), that would not be worthy of a blog post. As you may surmise, that is not what happened. After reconstructing the insufficiently-redacted private key, you end up with a key that has a SHA256 fingerprint (in hex) of: 72bef096997ec59a671d540d75bd1926363b2097eb9fe10220b2654b1f665b54 Searching for certificates which use that key fingerprint, we find one result: a certificate for hiltonhotels.jp (and a bunch of other, related, domains, as subjectAltNames). As of the time of writing, that certificate is not marked as revoked, and appears to be the same certificate that is currently presented to visitors of that site. This is, shall we say, not great. Anyone in possession of this private key which, I should emphasise, has presumably been public information since the post s publication date of February 2023 has the ability to completely transparently impersonate the sites listed in that certificate. That would provide an attacker with the ability to capture any data a user entered, such as personal information, passwords, or payment details, and also modify what the user s browser received, including injecting malware or other unpleasantness. In short, no good deed goes unpunished, and this attempt to educate the world at large about the benefits of secure key storage has instead published private key material. Remember, kids: friends don t let friends post redacted private keys to the Internet.

6 June 2023

Russell Coker: PinePhonePro First Impression

Hardware I received my PinePhone Pro [1] on Thursday, it seems in many ways better than the Purism Librem 5 [2] that I have previously written about. The PinePhone is thinner, lighter, and yet has a much longer battery life. A friend described the Librem5 as the CyberTruck phone and not in a good way. In a test I had my PinePhone and my Librem5 fully charged, left them for 4.5 hours without doing anything much with them, and then the PinePhone was at 85% and the Librem5 was at 57%. So the Librem5 will run out of battery after about 10 hours of not being used while a PinePhonePro can be expected to last about 30 hours. The PinePhonePro isn t as good as some of the recent Android phones in this regard but it shows the potential to be quite usable. For this test both phones were connected to a 2.4GHz Wifi network (which uses less power than 5GHz) and doing nothing much with an out of the box configuration. A phone that is checking email, social networking, and a couple of IM services will use the battery faster. But even if the PinePhone has it s battery used twice as fast in a more realistic test that will still be usable. Here are the passmark results from the PinePhone Pro [3] which got a CPU score of 888 compared to 507 for the Librem 5 and 678 for one of the slower laptops I ve used. The results are excluded from the Passmark averages because they identified the CPU as only having 4 cores (expecting just 4*A72) while the PinePhonePro has 6 cores (2*A72+4*A53). This phone definitely has the CPU power for convergence [4]! Default OS By default the PinePhone has a KDE based GUI and the Librem5 has a GNOME based GUI. I don t like any iteration of GNOME (I have tried them all and disliked them all) and I like KDE so I will tend to like anything that is KDE based more than anything GNOME based. But in addition to that the PinePhone has an interface that looks a lot like Android with the three on-screen buttons at the bottom of the display and the way it has the slide up tray for installed apps. Android is the most popular phone OS and looking like the most common option is often a good idea for a new and different product, this seems like an objective criteria to determine that the default GUI on the PinePhone is a better choice (at least for the default). When I first booted it and connected it to Wifi the updates app said that there were 633 updates to apply, but never applied them (I tried clicking on the update button but to no avail) and didn t give any error message. For me not being Debian is enough reason to dislike Manjaro, but if that wasn t enough then the failure to update would be a good start. When I ran pacman in a terminal window it said that each package was corrupt and asked if I wanted to delete it. According to tar tvJf the packages weren t corrupt. After downloading them again it said that they were corrupt again so it seemed that pacman wasn t working correctly. When the screen is locked and a call comes in it gives a window with Accept and Reject buttons but neither of them works. The default country code for Spacebar (the SMS app) is +1 (US) even though I specified Australia on the initial login. It also doesn t get the APN unlike Android phones which seem to have some sort of list of APNs. Upgrading to Debian The Debian Wiki page about Installing on the PinePhone Pro has the basic information [5]. The first thing it covers is installing the TOW boot loader which is already installed by default in recent PinePhones (such as mine). You can recognise that TOW is installed by pressing the volume-up button in the early stages of boot up (described as before and during the second vibration ), then the LED will turn blue and the phone will act as a USB mass storage device which makes it easy to do other install/recovery tasks. The other TOW option is to press volume-down to boot from a MicroSD card (the default is to boot the OS on the eMMC). The images linked from the Debian wiki page are designed to be installed with bmaptool from the bmap-tools Debian package. After installing that package and downloading the pre-built Mobian image I installed it with the command bmaptool copy mobian-pinephonepro-phosh-bookworm-12.0-rc3.img.gz /dev/sdb where /dev/sdb is the device that the USB mapped PinePhone storage was located. That took 6 minutes and then I rebooted my PinePhone into Mobian! Unfortunately the default GUI for Mobian is GNOME/Phosh. Changing it to KDE is my next task.

1 June 2023

Gunnar Wolf: Cheatable e-voting booths in Coahuila, Mexico, detected at the last minute

It s been a very long time I haven t blogged about e-voting, although some might remember it s been a topic I have long worked with; particularly, it was the topic of my 2018 Masters thesis, plus some five articles I wrote in the 2010-2018 period. After the thesis, I have to admit I got weary of the subject, and haven t pursued it anymore. So, I was saddened and dismayed to read that once again, as it has already happened the electoral authorities would set up a pilot e-voting program in the local elections this year, that would probably lead to a wider deployment next year, in the Federal elections. This year ( this week!), two States will have elections for their Governors and local Legislative branches: Coahuila (North, bordering with Texas) and Mexico (Center, surrounding Mexico City). They are very different states, demographically and in their development level. Pilot programs with e-voting booths have been seen in four states TTBOMK in the last ~15 years: Jalisco (West), Mexico City, State of Mexico and Coahuila. In Coahuila, several universities have teamed up with the Electoral Institute to develop their e-voting booth; a good thing that I can say about how this has been done in my country is that, at least, the Electoral Institute is providing their own implementations, instead of sourcing with e-booth vendors (which have their long, tragic story mostly in the USA, but also in other places). Not only that: They are subjecting the machines to audit processes. Not open audit processes, as demanded by academics in the field, but nevertheless, external, rigorous audit processes. But still, what me and other colleagues with Computer Security background oppose to is not a specific e-voting implementation, but the adoption of e-voting in general. If for nothing else, because of the extra complexity it brings, because of the many more checks that have to be put in place, and Because as programmers, we are aware of the ease with which bugs can creep in any given implementation both honest bugs (mistakes) and, much worse, bugs that are secretly requested and paid for. Anyway, leave this bit aside for a while. I m not implying there was any ill intent in the design or implementation of these e-voting booths. Two days ago, the Electoral Institute announced there was an important bug found in the Coahuila implementation. The bug consists, as far as I can understand from the information reported in newspapers, in: The problem was that the activation codes remained active after voting, so a voter could vote multiple times. This seems like an easy problem to be patched It most likely is. However, given the inability to patch, properly test, and deploy in a timely manner the fix to all of the booths (even though only 74 e-voting booths were to be deployed for this pilot), the whole pilot for Coahuila was scratched; Mexico State is voting with a different implementation that is not affected by this issue. This illustrates very well one of the main issues with e-voting technology: It requires a team of domain-specific experts to perform a highly specialized task (code and physical audits). I am happy and proud to say that part of the auditing experts were the professors of the Information Security Masters program of ESIME Culhuac n (the Masters program I was part of). The reaction by the Electoral Institute was correct. As far as I understand, there is no evidence suggesting this bug could have been purposefully built, but it s not impossible to rule it out. A traditional, paper-and-ink-based process is not only immune to attacks (or mistakes!) based on code such as this one, but can be audited by anybody. And that is, I believe, a fundamental property of democracy: ensuring the process is done right is not limited to a handful of domain experts. Not only that: In Mexico, I am sure there are hundreds of very proficient developers that could perform a code and equipment audit such as this one, but the audits are open by invitation only, so being an expert is not enough to get clearance to do this. In a democracy, the whole process should be observable and verifiable by anybody interested in doing so. Some links about this news:

Russell Coker: Do Desktop Computers Make Sense?

Laptop vs Desktop Price Currently the smaller and cheaper USB-C docks start at about $25 and Dell has a new Vostro with 8G of RAM and 2*USB-C ports for $788. That gives a bit over $800 for a laptop and dock vs $795 for the cheapest Dell desktop which also has 8G of RAM. For every way of buying laptops and desktops (EG buying from Officeworks, buying on ebay, etc) the prices for laptops and desktops seem very similar. For all those comparisons the desktop will typically have a faster CPU and more options for PCIe cards, larger storage, etc. But if you don t want to expand storage beyond the affordable 4TB NVMe/SSD devices, don t need to add PCIe cards, and don t need much CPU power then a laptop will do well. For the vast majority of the computer work I do my Thinkpad Carbon X1 Gen1 (from 2012) had plenty of CPU power. If someone who s not an expert in PC hardware was to buy a computer of a given age then laptops probably aren t more expensive than desktops even disregarding the fact that a laptop works without the need to purchase a monitor, a keyboard, or a mouse. I can get regular desktop PCs for almost nothing and get parts to upgrade them very cheaply but most people can t do that. I can also get a decent second-hand laptop and USB-C dock for well under $400. Servers and Gaming Systems For people doing serious programming or other compute or IO intensive tasks some variation on the server theme is the best option. That may be something more like the servers used by the r/homelab people than the corporate servers, or it might be something in the cloud, but a server is a server. If you are going to have a home server that s a tower PC then it makes sense to put a monitor on it and use it as a workstation. If your server makes so much noise that you can t spend much time in the same room or if it s hosted elsewhere then using a laptop to access it makes sense. Desktop computers for PC gaming makes sense as no-one seems to be making laptops with moderately powerful GPUs. The most powerful GPUs draw 150W which is more than most laptop PSUs can supply and even if a laptop PSU could supply that much there would be the issue of cooling. The Steam Deck [1] and the Nintendo Switch [2] can both work with USB-C docks. The PlayStation 5 [3] has a 350W PSU and doesn t support video over USB-C. The Steam Deck can do 8K resolution at 60Hz or 4K at 120Hz but presumably the newer Steam games will need a desktop PC with a more powerful GPU to properly use such resolutions. For people who want the best FPS rates on graphics intensive games it could make sense to have a tower PC. Also a laptop that s run at high CPU/GPU use for a long time will tend to have it s vents clogged by dust and possibly have the cooling fan wear out. Monitor Resolution Laptop support for a single 4K monitor became common in 2012 with the release of the Ivy Bridge mobile CPUs from Intel in 2012. My own experience of setting up 4K monitors for a Linux desktop in 2019 was that it was unreasonably painful and that the soon to be released Debian/Bookworm will make things work nicely for 4K monitors with KDE on X11. So laptop hardware has handled the case of a single high resolution monitor since before such monitors were cheap or common and before software supported it well. Of course at that time you had to use either a proprietary dock or a mini-DisplayPort to HDMI adaptor to get 4K working. But that was still easier than getting PCIe video cards supporting 4K resolution which is something that according to spec sheets wasn t well supported by affordable cards in 2017. Since USB-C became a standard feature in laptops in about 2017 support of more monitors than most people would want through a USB-C dock became standard. My Thinkpad X1 Carbon Gen5 which was released in 2017 will support 2*FullHD monitors plus a 4K monitor via a USB-C dock, I suspect it would do at least 2*4K monitors but haven t had a chance to test. Cheap USB-C docks supporting this sort of thing have only become common in the last year or so. How Many Computers per Home Among middle class Australians it s common to have multiple desktop PCs per household. One for each child who s over the age of about 13 and one for the parents seems to be reasonably common. Students in the later years of high-school and university students are often compelled to have laptops so having the number of laptops plus the number of desktops be larger than the population of the house probably isn t uncommon even among people who aren t really into computers. As an aside it s probably common among people who read my blog to have 2 desktops, a laptop, and a cloud server for their own personal use. But even among people who don t do that sort of thing having computers outnumber people in a home is probably common. A large portion of the computer users can do everything they need on a laptop. For gamers the graphics intensive games often run well on a console and that s probably the most effective way of getting to playing the games. Of course the fact that there is RGB RAM (RAM with Red, Green, and Blue LEDs to light up) along with a lot of other wild products sold to gamers suggests that gaming PCs are not about what runs the game most effectively and that an art/craft project with the PC is more important than actually playing games. Instead of having one desktop PC per bedroom and laptops for school/university as well it would make more sense to have a laptop per person and have a USB-C dock and monitor in each bedroom and a USB-C dock connected to a large screen TV in the lounge. This gives plenty of flexibility for moving around to do work and sharing what s on your computer with other people. It also allows taking a work computer home and having work with your monitor, having a friend bring their laptop to your home to work on something together, etc. For most people desktop computers don t make sense. While I think that convergence of phones with laptops and desktops is the way of the future [4] for most people having laptops take over all functions of desktops is the best option today.

31 May 2023

Arturo Borrero Gonz lez: Wikimedia Hackathon 2023 Athens summary

Post logo During the weekend of 19-23 May 2023 I attended the Wikimedia hackathon 2023 in Athens, Greece. The event physically reunited folks interested in the more technological aspects of the Wikimedia movement in person for the first time since 2019. The scope of the hacking projects include (but was not limited to) tools, wikipedia bots, gadgets, server and network infrastructure, data and other technical systems. My role in the event was two-fold: on one hand I was in the event because of my role as SRE in the Wikimedia Cloud Services team, where we provided very valuable services to the community, and I was expected to support the technical contributors of the movement that were around. Additionally, and because of that same role, I did some hacking myself too, which was specially augmented given I generally collaborate on a daily basis with some community members that were present in the hacking room. The hackathon had some conference-style track and I ran a session with my coworker Bryan, called Past, Present and Future of Wikimedia Cloud Services (Toolforge and friends) (slides) which was very satisfying to deliver given the friendly space that it was. I attended a bunch of other sessions, and all of them were interesting and well presented. The number of ML themes that were present in the program schedule was exciting. I definitely learned a lot from attending those sessions, from how LLMs work, some fascinating applications for them in the wikimedia space, to what were some industry trends for training and hosting ML models. Session 
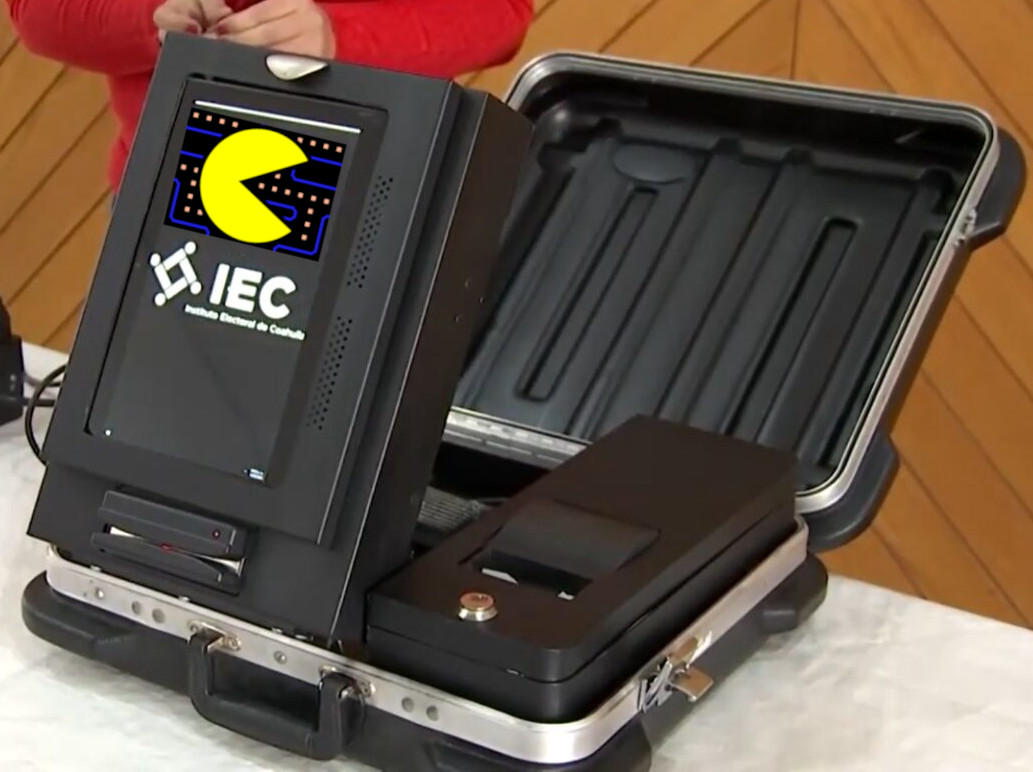
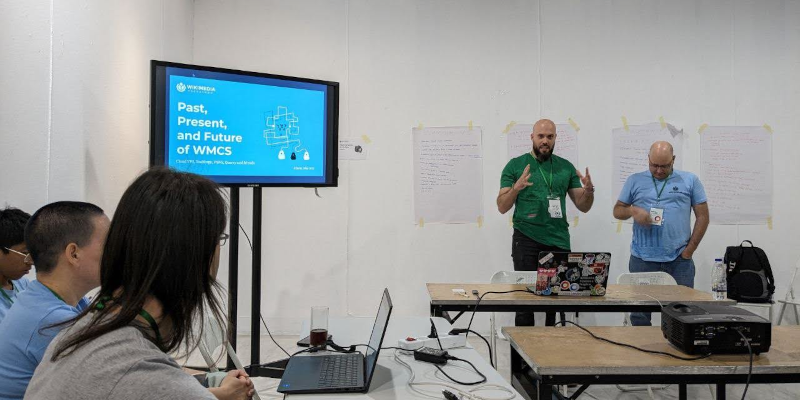
Despite the sessions, the main purpose of the hackathon was, well, hacking. While I was in the hacking space for more than 12 hours each day, my ability to get things done was greatly reduced by the constant conversations, help requests, and other social interactions with the folks. Don t get me wrong, I embraced that reality with joy, because the social bonding aspect of it is perhaps the main reason why we gathered in person instead of virtually. That being said, this is a rough list of what I did: The hackathon was also the final days of Technical Engagement as an umbrella group for WMCS and Developer Advocacy teams within the Technology department of the Wikimedia Foundation because of an internal reorg.. We used the chance to reflect on the pleasant time we have had together since 2019 and take a final picture of the few of us that were in person in the event. Technical Engagement 
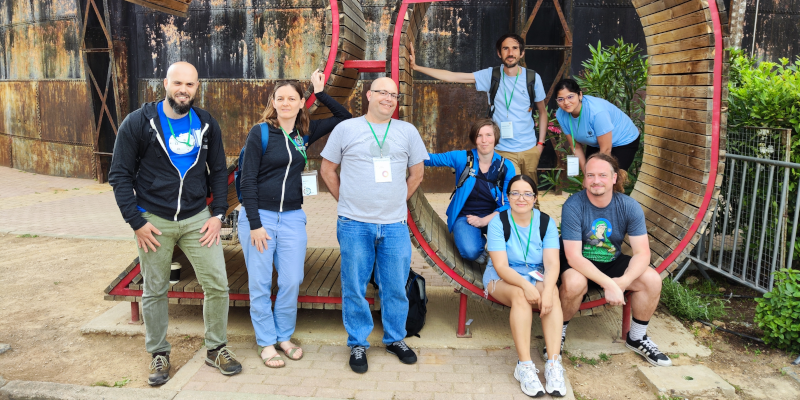
It wasn t the first Wikimedia Hackathon for me, and I felt the same as in previous iterations: it was a welcoming space, and I was surrounded by friends and nice human beings. I ended the event with a profound feeling of being privileged, because I was part of the Wikimedia movement, and because I was invited to participate in it.

29 May 2023

John Goerzen: Recommendations for Tools for Backing Up and Archiving to Removable Media

I have several TB worth of family photos, videos, and other data. This needs to be backed up and archived. Backups and archives are often thought of as similar. And indeed, they may be done with the same tools at the same time. But the goals differ somewhat: Backups are designed to recover from a disaster that you can fairly rapidly detect. Archives are designed to survive for many years, protecting against disaster not only impacting the original equipment but also the original person that created them. Reflecting on this, it implies that while a nice ZFS snapshot-based scheme that supports twice-hourly backups may be fantastic for that purpose, if you think about things like family members being able to access it if you are incapacitated, or accessibility in a few decades time, it becomes much less appealing for archives. ZFS doesn t have the wide software support that NTFS, FAT, UDF, ISO-9660, etc. do. This post isn t about the pros and cons of the different storage media, nor is it about the pros and cons of cloud storage for archiving; these conversations can readily be found elsewhere. Let s assume, for the point of conversation, that we are considering BD-R optical discs as well as external HDDs, both of which are too small to hold the entire backup set. What would you use for archiving in these circumstances? Establishing goals The goals I have are: I would welcome your ideas for what to use. Below, I ll highlight different approaches I ve looked into and how they stack up. Basic copies of directories The initial approach might be one of simply copying directories across. This would work well if the data set to be archived is smaller than the archival media. In that case, you could just burn or rsync a new copy with every update and be done. Unfortunately, this is much less convenient with data of the size I m dealing with. rsync is unavailable in that case. With some datasets, you could manually design some rsyncs to store individual directories on individual devices, but that gets unwieldy fast and isn t scalable. You could use something like my datapacker program to split the data across multiple discs/drives efficiently. However, updates will be a problem; you d have to re-burn the entire set to get a consistent copy, or rely on external tools like mtree to reflect deletions. Not very convenient in any case. So I won t be using this. tar or zip While you can split tar and zip files across multiple media, they have a lot of issues. GNU tar s incremental mode is clunky and buggy; zip is even worse. tar files can t be read randomly, making it extremely time-consuming to extract just certain files out of a tar file. The only thing going for these formats (and especially zip) is the wide compatibility for restoration. dar Here we start to get into the more interesting tools. Dar is, in my opinion, one of the best Linux tools that few people know about. Since I first wrote about dar in 2008, it s added some interesting new features; among them, binary deltas and cloud storage support. So, dar has quite a few interesting features that I make use of in other ways, and could also be quite helpful here: Additionally, dar comes with a dar_manager program. dar_manager makes a database out of dar catalogs (or archives). This can then be used to identify the precise archive containing a particular version of a particular file. All this combines to make a useful system for archiving. Isolated catalogs are tiny, and it would be easy enough to include the isolated catalogs for the entire set of archives that came before (or even the dar_manager database file) with each new incremental archive. This would make restoration of a particular subset easy. The main thing to address with dar is that you do need dar to extract the archive. Every dar release comes with source code and a win64 build. dar also supports building a statically-linked Linux binary. It would therefore be easy to include win64 binary, Linux binary, and source with every archive run. dar is also a part of multiple Linux and BSD distributions, which are archived around the Internet. I think this provides a reasonable future-proofing to make sure dar archives will still be readable in the future. The other challenge is user ability. While dar is highly portable, it is fundamentally a CLI tool and will require CLI abilities on the part of users. I suspect, though, that I could write up a few pages of instructions to include and make that a reasonably easy process. Not everyone can use a CLI, but I would expect a person that could follow those instructions could be readily-enough found. One other benefit of dar is that it could easily be used with tapes. The LTO series is liked by various hobbyists, though it could pose formidable obstacles to non-hobbyists trying to aceess data in future decades. Additionally, since the archive is a big file, it lends itself to working with par2 to provide redundancy for certain amounts of data corruption. git-annex git-annex is an interesting program that is designed to facilitate managing large sets of data and moving it between repositories. git-annex has particular support for offline archive drives and tracks which drives contain which files. The idea would be to store the data to be archived in a git-annex repository. Then git-annex commands could generate filesystem trees on the external drives (or trees to br burned to read-only media). In a post about using git-annex for blu-ray backups, an earlier thread about DVD-Rs was mentioned. This has a few interesting properties. For one, with due care, the files can be stored on archival media as regular files. There are some different options for how to generate the archives; some of them would place the entire git-annex metadata on each drive/disc. With that arrangement, one could access the individual files without git-annex. With git-annex, one could reconstruct the final (or any intermediate) state of the archive appropriately, handling deltions, renames, etc. You would also easily be able to know where copies of your files are. The practice is somewhat more challenging. Hundreds of thousands of files what I would consider a medium-sized archive can pose some challenges, running into hours-long execution if used in conjunction with the directory special remote (but only minutes-long with a standard git-annex repo). Ruling out the directory special remote, I had thought I could maybe just work with my files in git-annex directly. However, I ran into some challenges with that approach as well. I am uncomfortable with git-annex mucking about with hard links in my source data. While it does try to preserve timestamps in the source data, these are lost on the clones. I wrote up my best effort to work around all this. In a forum post, the author of git-annex comments that I don t think that CDs/DVDs are a particularly good fit for git-annex, but it seems a couple of users have gotten something working. The page he references is Managing a large number of files archived on many pieces of read-only medium. Some of that discussion is a bit dated (for instance, the directory special remote has the importtree feature that implements what was being asked for there), but has some interesting tips. git-annex supplies win64 binaries, and git-annex is included with many distributions as well. So it should be nearly as accessible as dar in the future. Since git-annex would be required to restore a consistent recovery image, similar caveats as with dar apply; CLI experience would be needed, along with some written instructions. Bacula and BareOS Although primarily tape-based archivers, these do also also nominally support drives and optical media. However, they are much more tailored as backup tools, especially with the ability to pull from multiple machines. They require a database and extensive configuration, making them a poor fit for both the creation and future extractability of this project. Conclusions I m going to spend some more time with dar and git-annex, testing them out, and hope to write some future posts about my experiences.

Russell Coker: Considering Convergence

What is Convergence In 2013 Kyle Rankin (at the time Linux Journal columnist and CSO of Purism) wrote a Linux Journal article about Linux convergence [1] (which means using a phone and a dock to replace a desktop) featuring the Nokia N900 smart phone and a chroot environment on the Motorola Droid 4 Android phone. Both of them have very limited hardware even by the standards of the day and neither of which were systems I d consider using all the time. None of the Android phones I used at that time were at all comparable to any sort of desktop system I d want to use. Hardware for Convergence Comparing a Phone to a Laptop The first hardware issue for convergence is docks and other accessories to attach a small computer to hardware designed for larger computers. Laptop docks have been around for decades and for decades I haven t been using them because they have all been expensive and specific to a particular model of laptop. Having an expensive dock at home and an expensive dock at the office and then replacing them both when the laptop is replaced may work well for some people but wasn t something I wanted to do. The USB-C interface supports data, power, and DisplayPort video over the same cable and now USB-C docks start at about $20 on eBay and dock functionality is built in to many new monitors. I can take a USB-C device to the office of any large company and know there s a good chance that there will be a USB-C dock ready for me to use. The fact that USB-C is a standard feature for phones gives obvious potential for convergence. The next issue is performance. The Passmark benchmark seems like a reasonable way to compare CPUs [2]. It may not be the best benchmark but it has an excellent set of published results for Intel and AMD CPUs. I ran that benchmark on my Librem5 [3] and got a result of 507 for the CPU score. At the end of 2017 I got a Thinkpad X301 [4] which rates 678 on Passmark. So the Librem5 has 3/4 the CPU power of a laptop that was OK for my use in 2018. Given that the X301 was about the minimum specs for a PC that I can use (for things other than serious compiles, running VMs, etc) the Librem 5 has 3/4 the CPU power, only 3G of RAM compared to 6G, and 32G of storage compared to 64G. Here is the Passmark page for my Librem5 [5]. As an aside my Libnrem5 is apparently 25% faster than the other results for the same CPU did the Purism people do something to make their device faster than most? For me the Librem5 would be at the very low end of what I would consider a usable desktop system. A friend s N900 (like the one Kyle used) won t complete the Passmark test apparently due to the Extended Instructions (NEON) test failing. But of the rest of the tests most of them gave a result that was well below 10% of the result from the Librem5 and only the Compression and CPU Single Threaded tests managed to exceed 1/4 the speed of the Librem5. One thing to note when considering the specs of phones vs desktop systems is that the MicroSD cards designed for use in dashcams and other continuous recording devices have TBW ratings that compare well to SSDs designed for use in PCs, so swap to a MicroSD card should work reasonably well and be significantly faster than the hard disks I was using for swap in 2013! In 2013 I was using a Thinkpad T420 as my main system [6], it had 8G of RAM (the same as my current laptop) although I noted that 4G was slow but usable at the time. Basically it seems that the Librem5 was about the sort of hardware I could have used for convergence in 2013. But by today s standards and with the need to drive 4K monitors etc it s not that great. The N900 hardware specs seem very similar to the Thinkpads I was using from 1998 to about 2003. However a device for convergence will usually do more things than a laptop (IE phone and camera functionality) and software had become significantly more bloated in 1998 to 2013 time period. A Linux desktop system performed reasonably with 32MB of RAM in 1998 but by 2013 even 2G was limiting. Software Issues for Convergence Jeremiah Foster (Director PureOS at Purism) wrote an interesting overview of some of the software issues of convergence [7]. One of the most obvious is that the best app design for a small screen is often very different from that for a large screen. Phone apps usually have a single window that shows a view of only one part of the data that is being worked on (EG an email program that shows a list of messages or the contents of a single message but not both). Desktop apps of any complexity will either have support for multiple windows for different data (EG two messages displayed in different windows) or a single window with multiple different types of data (EG message list and a single message). What we ideally want is all the important apps to support changing modes when the active display is changed to one of a different size/resolution. The Purism people are doing some really good work in this regard. But it is a large project that needs to involve a huge range of apps. The next thing that needs to be addressed is the OS interface for managing apps and metadata. On a phone you swipe from one part of the screen to get a list of apps while on a desktop you will probably have a small section of a large monitor reserved for showing a window list. On a desktop you will typically have an app to manage a list of items copied to the clipboard while on Android and iOS there is AFAIK no standard way to do that (there is a selection of apps in the Google Play Store to do this sort of thing). Purism has a blog post by Sebastian Krzyszkowiak about some of the development of the OS to make it work better for convergence and the status of getting it in Debian [8]. The limitations in phone hardware force changes to the software. Software needs to use less memory because phone RAM can t be upgraded. The OS needs to be configured for low RAM use which includes technologies like the zram kernel memory compression feature. Security When mobile phones first came out they were used for less secret data. Loss of a phone was annoying and expensive but not a security problem. Now phone theft for the purpose of gaining access to resources stored on the phone is becoming a known crime, here is a news report about a thief stealing credit cards and phones to receive the SMS notifications from banks [9]. We should expect that trend to continue, stealing mobile devices for ssh keys, management tools for cloud services, etc is something we should expect to happen. A problem with mobile phones in current use is that they have one login used for all access from trivial things done in low security environments (EG paying for public transport) to sensitive things done in more secure environments (EG online banking and healthcare). Some applications take extra precautions for this EG the Android app I use for online banking requires authentication before performing any operations. The Samsung version of Android has a system called Knox for running a separate secured workspace [10]. I don t think that the Knox approach would work well for a full Linux desktop environment, but something that provides some similar features would be a really good idea. Also running apps in containers as much as possible would be a good security feature, this is done by default in Android and desktop OSs could benefit from it. The Linux desktop security model of logging in to a single account and getting access to everything has been outdated for a long time, probably ever since single-user Linux systems became popular. We need to change this for many reasons and convergence just makes it more urgent. Conclusion I have become convinced that convergence is the way of the future. It has the potential to make transporting computers easier, purchasing cheaper (buy just a phone and not buy desktop and laptop systems), and access to data more convenient. The Librem5 doesn t seem up to the task for my use due to being slow and having short battery life, the PinePhone Pro has more powerful hardware and allegedly has better battery life [11] so it might work for my needs. The PinePhone Pro probably won t meet the desktop computing needs of most people, but hardware keeps getting faster and cheaper so eventually most people could have their computing needs satisfied with a phone. The current state of software for convergence and for Linux desktop security needs some improvement. I have some experience with Linux security so this is something I can help work on. To work on improving this I asked Linux Australia for a grant for me and a friend to get PinePhone Pro devices and a selection of accessories to go with them. Having both a Librem5 and a PinePhone Pro means that I can test software in different configurations which will make developing software easier. Also having a friend who s working on similar things will help a lot, especially as he has some low level hardware skills that I lack. Linux Australia awarded the grant and now the PinePhones are in transit. Hopefully I will have a PinePhone in a couple of weeks to start work on this.

18 May 2023

Antoine Beaupr : A terrible Pixel Tablet

In a strange twist of history, Google finally woke and thought "I know what we need to do! We need to make a TABLET!". So some time soon in 2023, Google will release "The tablet that only Google could make", the Pixel Tablet. Having owned a Samsung Galaxy Tab S5e for a few years, I was very curious to see how this would pan out and especially whether it would be easier to flash than the Samsung. As an aside, I figured I would give that a shot, and within a few days managed to completely brick the device. Awesome. See gts4lvwifi for the painful details of that. In any case, Google made a tablet. I own a Pixel phone and I'm moderately happy with it. It's easy to flash with CalyxOS, maybe this is the promise land of tablets?

Compared with the Samsung But it turns out that the Pixel Tablet pales in comparison with the Samsung tablet, produced 4 years ago, in 2019:
  • it's thicker (8.1mm vs 5.5mm)
  • it's heavier (493g vs 400g)
  • it's not AMOLED (IPS LCD)
  • it doesn't have an SD card reader
  • its camera is worse (8MP vs 13MP, 1080p video instead of 4k)
  • it's more expensive (670EUR vs 410EUR)
What the Pixel tablet has going for it:
  • a slightly more powerful CPU
  • a stylus
  • more storage (128GB or 256GB vs 64GB or 128GB)
  • more RAM (8GB vs 4GB or 6GB)
  • Wifi 6
I guess I should probably wait for the actual device to come out to see reviews and how it stacks up, but so far it's kind of impressive how underwhelming this is. Also note that we're comparing against a very old Samsung tablet here, a fairer comparison might be against the Samsung Galaxy Tab S8. There the sizes are comparable, and the Samsung is more expensive than the Pixel, but then the Pixel has absolutely zero advantages and all the other disadvantages.

The Dock The "Dock" is also worth a little aside. See, the tablet comes with a dock that doubles as a speaker. You can't buy the tablet without the dock. You have to have a dock. I shit you not, actual quote: "Can I purchase a Pixel Tablet without the Charging Speaker Dock? No, you can only purchase the Pixel Tablet with the Charging Speaker Dock." In case you really, really like the dock, "You may purchase additional Charging Speaker Docks separately (coming soon)." And no, they can't all play together, only the dock the tablet is docked into will play audio. The dock is not a Bluetooth speaker, it can only play audio from that one tablet that Google made, this one time. It's also not a battery pack. It's just a charger with speakers in it. Promising e-waste. Again, I hope I'm wrong and that this is going to be a fine tablet. But so far, it looks like it doesn't even come close to whatever Samsung threw over the fence before the apocalypse (remember 2019? were we even born yet?). "The tablet that only Google could make." Amazing. Hopefully no one else gets any bright ideas like this.

4 May 2023

Emanuele Rocca: UEFI Secure Boot on the Raspberry Pi

UPDATE: this post unexpectedly ended up on Hacker News and I received a lot of comments. The two most important points being made are (1) that Secure Boot on the RPi as described here is not actually truly secure. An attacker who successfully gained root could just mount the firmware partition and either add their own keys to the EFI variable store or replace the firmware altogether with a malicious one. (2) The TianCore firmware cannot be used instead of the proprietary blob as I mentioned. What truly happens is that the proprietary blob is loaded onto the VideoCore cores, then TianoCore is loaded onto the ARM cores. Thanks for the corrections.

A port of the free software TianoCore UEFI firmware can be used instead of the proprietary boot blob to boot the Raspberry Pi. This allows to install Debian on the RPi with the standard Debian Installer, and it also makes it possible to use UEFI Secure Boot. Note that Secure Boot had been broken on arm64 for a while, but it s now working in Bookworm!.

Debian Installer UEFI boot
To begin, you ll need to download the appropriate firmware files for the RPi3 or RPi4. I ve got a Raspberry Pi 3 Model B+ myself, so the rest of this document will assume an RPi3 is being installed.
Plug the SD card you are going to use as the RPi storage device into another system. Say it shows up as /dev/sdf. Then:
# Create an msdos partition table
$ sudo parted --script /dev/sdf mklabel msdos
# Create, format, and label a 10M fat32 partition
$ sudo parted --script /dev/sdf mkpart primary fat32 0% 10M
$ sudo mkfs.vfat /dev/sdf1
$ sudo fatlabel /dev/sdf1 RPI-FW
# Get the UEFI firmware onto the SD card
$ sudo mount /dev/sdf1 /mnt/data/
$ sudo unzip Downloads/RPi3_UEFI_Firmware_v1.38.zip -d /mnt/data/
$ sudo umount /mnt/data
At this point, the SD card can be used to boot the RPi, and you ll get a UEFI firmware.
Download the Bookworm RC 2 release of the installer, copy it to a USB stick as described in the Installation Guide, and boot your RPi from the stick. If for some reason booting from the stick does not happen automatically, enter the firmware interface with ESC and choose the USB stick from Boot Manager.
Proceed with the installation as normal, paying attention not to modify the firmware partition labeled RPI-FW. I initially thought it would be nice to reuse the firmware partition as ESP partition as well. However, setting the esp flag on makes the RPi unbootable. Either configuring the partition as ESP in debian-installer, or manually with sudo parted --script /dev/sda set 1 esp on, breaks boot. In case you accidentally do that, set it back to off and the edk2 firmware will boot again.
What I suggest doing in terms of partitioning is: (1) leave the 10M partition created above for the firmware alone, and (2) create another 512M or so ESP partition for EFI boot.
The installation should go smoothly till the end, but rebooting won t work. Doh. This is because of an important gotcha: the Raspberry Pi port of the TianoCore firmware we are using does not support setting UEFI variables persistently from a "High Level Operating System (HLOS)", which is the debian-installer in our case. Persistently is the keyword there: variables can be set and modified regularly with efibootmgr or otherwise, but crucially the modifications do not survive reboot. However, changes made from the firmware interface itself are persistent. So enter the firmware with ESC right after booting the RPi, select Boot Maintenance Manager Boot Options Add Boot Option Your SD card Your ESP partition EFI debian shimaa64.efi. Choose a creative name for your boot entry (eg: "debian"), save and exit the firmware interface. Bookworm should be booting fine at this point!

Enabling Secure Boot
Although the TianoCore firmware does support Secure Boot, there are no keys enrolled by default. To add the required keys, copy PK-0001.der, DB-0001.der, DB-0002.der, KEK-0001.der, and KEK-0002.der to a FAT32 formatted USB stick.
Here s a summary of the Subject field for each of the above:
PK-0001.der.pem
        Subject: O = Debian, CN = Debian UEFI Secure Boot (PK/KEK key), emailAddress = debian-devel@lists.debian.org
DB-0001.der.pem
        Subject: C = US, ST = Washington, L = Redmond, O = Microsoft Corporation, CN = Microsoft Windows Production PCA 2011
DB-0002.der.pem
        Subject: C = US, ST = Washington, L = Redmond, O = Microsoft Corporation, CN = Microsoft Corporation UEFI CA 2011
KEK-0001.der.pem
        Subject: O = Debian, CN = Debian UEFI Secure Boot (PK/KEK key), emailAddress = debian-devel@lists.debian.org
KEK-0002.der.pem
        Subject: C = US, ST = Washington, L = Redmond, O = Microsoft Corporation, CN = Microsoft Corporation KEK CA 2011
Plug the stick into the RPi, boot and enter the firmware interface with ESC. Select Device Manager Secure Boot Configuration Secure Boot Mode choose Custom Mode Custom Secure Boot Options PK Options Enroll PK choose PK-0001.der. Do the same for DB Options, this time choose DB-0001.der and DB-0002.der. As you may have guessed by now, the same must be done for KEK Options, but adding KEK-0001.der and KEK-0002.der. Save, exit, reboot. If everything went well, your RPi now has booted with Secure Boot enabled.
See https://wiki.debian.org/SecureBoot for the details on how to check whether Secure Boot has been enabled correctly and much more.

27 April 2023

Jonathan McDowell: Repurposing my C.H.I.P.

Way back at DebConf16 Gunnar managed to arrange for a number of Next Thing Co. C.H.I.P. boards to be distributed to those who were interested. I was lucky enough to be amongst those who received one, but I have to confess after some initial experimentation it ended up sitting in its box unused. The reasons for that were varied; partly about not being quite sure what best to do with it, partly due to a number of limitations it had, partly because NTC sadly went insolvent and there was less momentum around the hardware. I ve always meant to go back to it, poking it every now and then but never completing a project. I m finally almost there, and I figure I should write some of it up. TL;DR: My C.H.I.P. is currently running a mainline Linux 6.3 kernel with only a few DTS patches, an upstream u-boot v2022.1 with a couple of minor patches and an unmodified Debian bullseye armhf userspace.

Storage The main issue with the C.H.I.P. is that it uses MLC NAND, in particular mine has an 8MB H27QCG8T2E5R. That ended up unsupported in Linux, with the UBIFS folk disallowing operation on MLC devices. There s been subsequent work to enable an SLC emulation mode which makes the device more reliable at the cost of losing capacity by pairing up writes/reads in cells (AFAICT). Some of this hit for the H27UCG8T2ETR in 5.16 kernels, but I definitely did some experimentation with 5.17 without having much success. I should maybe go back and try again, but I ended up going a different route. It turned out that BytePorter had documented how to add a microSD slot to the NTC C.H.I.P., using just a microSD to full SD card adapter. Every microSD card I buy seems to come with one of these, so I had plenty lying around to test with. I started with ensuring the kernel could see it ok (by modifying the device tree), but once that was all confirmed I went further and built a more modern u-boot that talked to the SD card, and defaulted to booting off it. That meant no more relying on the internal NAND at all! I do see some flakiness with the SD card, which is possibly down to the dodgy way it s hooked up (I should probably do a basic PCB layout with JLCPCB instead). That s mostly been mitigated by forcing it into 1-bit mode instead of 4-bit mode (I tried lowering the frequency too, but that didn t make a difference). The problem manifests as:
sunxi-mmc 1c11000.mmc: data error, sending stop command
and then all storage access freezing (existing logins still work, if the program you re trying to run is in cache). I can t find a conclusive software solution to this; I m pretty sure it s the hardware, but I don t understand why the recovery doesn t generally work.

Random power offs After I had storage working I d see random hangs or power offs. It wasn t quite clear what was going on. So I started trying to work out how to find out the CPU temperature, in case it was overheating. It turns out the temperature sensor on the R8 is part of the touchscreen driver, and I d taken my usual approach of turning off all the drivers I didn t think I d need. Enabling it (CONFIG_TOUCHSCREEN_SUN4I) gave temperature readings and seemed to help somewhat with stability, though not completely. Next I ended up looking at the AXP209 PMIC. There were various scripts still installed (I d started out with the NTC Debian install and slowly upgraded it to bullseye while stripping away the obvious pieces I didn t need) and a start-up script called enable-no-limit. This turned out to not be running (some sort of expectation of i2c-dev being loaded and another failing check), but looking at the script and the data sheet revealed the issue. The AXP209 can cope with 3 power sources; an external DC source, a Li-battery, and finally a USB port. I was powering my board via the USB port, using a charger rated for 2A. It turns out that the AXP209 defaults to limiting USB current to 900mA, and that with wifi active and the CPU busy the C.H.I.P. can rise above that. At which point the AXP shuts everything down. Armed with that info I was able to understand what the power scripts were doing and which bit I needed - i2cset -f -y 0 0x34 0x30 0x03 to set no limit and disable the auto-power off. Additionally I also discovered that the AXP209 had a built in temperature sensor as well, so I added support for that via iio-hwmon.

WiFi WiFi on the C.H.I.P. is provided by an RTL8723BS SDIO attached device. It s terrible (and not just here, I had an x86 based device with one where it also sucked). Thankfully there s a driver in staging in the kernel these days, but I ve still found it can fall out with my house setup, end up connecting to a further away AP which then results in lots of retries, dropped frames and CPU consumption. Nailing it to the AP on the other side of the wall from where it is helps. I haven t done any serious testing with the Bluetooth other than checking it s detected and can scan ok.

Patches I patched u-boot v2022.01 (which shows you how long ago I was trying this out) with the following to enable boot from external SD:
u-boot C.H.I.P. external SD patch
diff --git a/arch/arm/dts/sun5i-r8-chip.dts b/arch/arm/dts/sun5i-r8-chip.dts
index 879a4b0f3b..1cb3a754d6 100644
--- a/arch/arm/dts/sun5i-r8-chip.dts
+++ b/arch/arm/dts/sun5i-r8-chip.dts
@@ -84,6 +84,13 @@
 		reset-gpios = <&pio 2 19 GPIO_ACTIVE_LOW>; /* PC19 */
 	 ;
 
+	mmc2_pins_e: mmc2@0  
+		pins = "PE4", "PE5", "PE6", "PE7", "PE8", "PE9";
+		function = "mmc2";
+		drive-strength = <30>;
+		bias-pull-up;
+	 ;
+
 	onewire  
 		compatible = "w1-gpio";
 		gpios = <&pio 3 2 GPIO_ACTIVE_HIGH>; /* PD2 */
@@ -175,6 +182,16 @@
 	status = "okay";
  ;
 
+&mmc2  
+	pinctrl-names = "default";
+	pinctrl-0 = <&mmc2_pins_e>;
+	vmmc-supply = <&reg_vcc3v3>;
+	vqmmc-supply = <&reg_vcc3v3>;
+	bus-width = <4>;
+	broken-cd;
+	status = "okay";
+ ;
+
 &ohci0  
 	status = "okay";
  ;
diff --git a/arch/arm/include/asm/arch-sunxi/gpio.h b/arch/arm/include/asm/arch-sunxi/gpio.h
index f3ab1aea0e..c0dfd85a6c 100644
--- a/arch/arm/include/asm/arch-sunxi/gpio.h
+++ b/arch/arm/include/asm/arch-sunxi/gpio.h
@@ -167,6 +167,7 @@ enum sunxi_gpio_number  
 
 #define SUN8I_GPE_TWI2		3
 #define SUN50I_GPE_TWI2		3
+#define SUNXI_GPE_SDC2		4
 
 #define SUNXI_GPF_SDC0		2
 #define SUNXI_GPF_UART0		4
diff --git a/board/sunxi/board.c b/board/sunxi/board.c
index fdbcd40269..f538cb7e20 100644
--- a/board/sunxi/board.c
+++ b/board/sunxi/board.c
@@ -433,9 +433,9 @@ static void mmc_pinmux_setup(int sdc)
 			sunxi_gpio_set_drv(pin, 2);
 		 
 #elif defined(CONFIG_MACH_SUN5I)
-		/* SDC2: PC6-PC15 */
-		for (pin = SUNXI_GPC(6); pin <= SUNXI_GPC(15); pin++)  
-			sunxi_gpio_set_cfgpin(pin, SUNXI_GPC_SDC2);
+		/* SDC2: PE4-PE9 */
+		for (pin = SUNXI_GPE(4); pin <= SUNXI_GPE(9); pin++)  
+			sunxi_gpio_set_cfgpin(pin, SUNXI_GPE_SDC2);
 			sunxi_gpio_set_pull(pin, SUNXI_GPIO_PULL_UP);
 			sunxi_gpio_set_drv(pin, 2);
 		 

I ve sent some patches for the kernel device tree upstream - there s an outstanding issue with the Bluetooth wake GPIO causing the serial port not to probe(!) that I need to resolve before sending a v2, but what s there works for me. The only remaining piece is patch to enable the external SD for Linux; I don t think it s appropriate to send upstream but it s fairly basic. This limits the bus to 1 bit rather than the 4 bits it s capable of, as mentioned above.
Linux C.H.I.P. external SD DTS patch diff diff --git a/arch/arm/boot/dts/sun5i-r8-chip.dts b/arch/arm/boot/dts/sun5i-r8-chip.dts index fd37bd1f3920..2b5aa4952620 100644 --- a/arch/arm/boot/dts/sun5i-r8-chip.dts +++ b/arch/arm/boot/dts/sun5i-r8-chip.dts @@ -163,6 +163,17 @@ &mmc0 status = "okay"; ; +&mmc2 + pinctrl-names = "default"; + pinctrl-0 = <&mmc2_4bit_pe_pins>; + vmmc-supply = <&reg_vcc3v3>; + vqmmc-supply = <&reg_vcc3v3>; + bus-width = <1>; + non-removable; + disable-wp; + status = "okay"; + ; + &ohci0 status = "okay"; ;

As for what I m doing with it, I think that ll have to be a separate post.

18 April 2023

Matt Brown: co2mon.nz: Ventilation monitoring as a service

Previously, I explained why ventilation monitoring is important, and the opportunity I see to help accelerate deployment of high quality ventilation monitoring for small businesses and organisations. In this post, I m going to discuss my plans to tackle that opportunity:

My journey to ventilation monitoring I started looking into ventilation monitoring in detail last year when I wanted to ensure that the classrooms of our local primary school were well ventilated during the Omicron outbreak. That research revealed that the existing products on offer were challenging to deploy in a school environment from a cost perspective while also not providing perfect functionality. I built and deployed a set of monitors to our local school, along with a corresponding set of software and web services that provide management of the monitors and visibility into the collected data and trends. The benefit of the monitoring is evident - CO2 concentration drops immediately after a notification occurs, indicating the intended action of increasing ventilation is taking place. Initially this occurred more frequently, but over time low concentrations of CO2, indicating good ventilation levels, are regularly achieved across the school day thanks to simple changes in routine being established, such as leaving windows cracked open. As the benefits of the project to the school became clear, my ambition and vision for ventilation monitoring grew from wanting to see my children learn in a safe and effective environment to desiring safe and effective learning, working, living and social spaces for everyone.

co2mon.nz: Ventilation monitoring as a service prototype co2mon.nz is the service that I have launched to explore this opportunity. Based on the same hardware and software that I used for the school deployment I am selling both a physical CO2 monitor and an ongoing subscription service for the management and monitoring. Together, the monitor and software provide an effective and affordable path to understanding indoor air quality and ventilation status that anyone can use.

CO2 monitor The CO2 monitor hardware and firmware are based on Oliver Seiler s design using a Sensirion SCD40 module for CO2 measurement and providing immediate in-room feedback via an on-monitor screen as well as a red/orange/green traffic light . In addition to the immediate feedback provided by the monitor itself, a WiFi connection can be configured allowing every measurement to be reported back to the supporting monitoring and management service. At the current prototype stage, I am building all the hardware, 3D printing the plastic cases and assembling the circuit board from purchased components through a production line in my home workshop. The monitor is powered via a standard USB cable and wall adaptor for simplicity. The first batch of monitors I built have been operating smoothly for nearly a year now. Further refinement and development of the design is required but already I am impressed with the potential this combination of easily accessible components provides to enable widespread adoption and deployment of ventilation monitoring.

Monitoring and management service The web service provides a historical record of CO2 levels from each monitor through a set of graphs and other dashboards and allows for this data to be shared or published. This is useful both for providing visibility into ventilation status to those not directly present in the space (e.g. across an entire school) and to allow insights into trends and patterns in ventilation to be observed and acted upon. When I began the project I approached the software side as an opportunity to explore the real-world equivalents of many of the internal tools and components that I was used to using within Google. That s been a fun process, even though it means I ve invested far more time on the software than the current number of customers or business state can really justify. Communication with the monitors occurs via MQTT into a custom Go service responsible for maintaining the fleet and exposing the measurement data to Prometheus which acts as the storage layer. A second service (based on the Buffalo web framework) is responsible for serving the web interface containing the dashboards and configuration options. Alongside these core components another small Golang service manages a private X509 certificate authority to provide monitor identity and encryption of the measurement data and an automated pipeline of scripts and triggers takes care of firmware provisioning, sensor calibration and burn-in/failure testing when building batches of monitors. While simple, the design is easy to manage and could scale to support many, many more monitors without significant effort. I m hosting the infrastructure on AWS, which I ve found pleasant and easy to use, and while not a typical choice, I m very pleased with the performance and flexibility that Prometheus offers as a data storage layer.

Areas of development The prototype has been effective in proving the feasibility of offering ventilation monitoring as a service, but to evolve the prototype into an actual business is going to require further effort in the following areas:

Finding product market fit I m confident that what co2mon.nz is offering could provide a useful and needed service for many small business owners and numerous others, but the question of whether it s sufficiently compelling that a sizeable group of customers see enough value that they re willing to regularly pay for it and therefore sustain a business providing the service is not yet proven. While initial feedback on the idea has been positive, much of it has been from family and friends and I ve spent more time building the software (which has been fun and educational) than I have talking to actual potential customers and understanding their needs and wants. This is a classic trap that technical founders fall into, and I m guilty despite my best intentions it s comfortable and easy for me to work on the parts where I have existing experience and neglect putting time into the customer-facing sales, marketing and research which are more uncomfortable, new and challenging!

Scaling monitor production Scaling from the current prototype batches I have built to even modest levels (e.g. hundreds) of sales will require outsourcing. There are several potential New Zealand and overseas providers I can work with which look very promising, but will require iteration of the hardware design (e.g. to remove through-hole components which add complexity and expense to the PCB assembly process). The lead times I ve been quoted for working with these outsourced providers are in the order of 1-2 months per batch, and on top of this there are a number of other risks in terms of component availability and regulatory compliance that may add additional delays or time to resolve, particularly as my experience leans towards the software rather than the hardware. It seems counter-intuitive to worry about how to scale to meet demand that doesn t yet provably exist, but given the potentially long lead times involved in establishing outsourced production I think it s worth taking some risk in starting this journey early.

Next steps My aim now is to intentionally change my focus from the software to learning about the market and finding the right product to offer via two channels:
  1. Via online marketing, to reach a wide range of potential customers and allow rapid iteration and testing of a variety of product/service combinations, including referral options for existing customers.
  2. In-person with small businesses in my local area to seek out direct feedback and thoughts on the general issue of ventilation monitoring and the specific service I m offering.
One concrete possibility I m keen to test via both channels is a simple monthly price for the combined service, rather than purchasing a monitor and separate software subscription. This has the potential to be both simpler to market and explain to customers, while also opening the possibility of short-term rental or evaluation to customers who are not willing to make a long-term investment or commitment. In parallel to the customer-focused discovery work, but as an explicit lower priority, I ll order an initial small batch of outsourced monitors to begin gaining experience with that process accepting the risk that the time and cost may turn out to be wasted if the product is wrong or not a good match for customers needs.

10 April 2023

Russell Coker: BTRFS Rebuild Time

In February I replaced a Dell T320 server with a HP Z640 workstation for a home server/workstation [1]. The T320 has 8*3.5 drive bays which I had used to put 3*4TB disks in a BTRFS RAID-10 array for 6TB of usable capacity. The Z640 has only 2*3.5 bays and 4*2.5 bays, so one option I could have taken was to buy a 4TB 2.5 SSD and keep the same 3*4TB array as before. Instead I chose to use an 8TB disk I had spare in an array with one of the original 4TB disks and some extra on NVMe devices (the system has 2*1TB NVMe devices which are used as a 380G RAID-1 for the root filesystem and the rest for the storage array). It s nice how BTRFS allows putting any storage you have in a RAID-10 configuration. Unfortunately it seems that I chose the wrong 4TB disk to use for this as it failed three days ago. It gave thousands of read and write errors and Linux decided that the drive no longer existed. I tried rebooting the system to get it in the BTRFS array again but it failed again and failed so quickly that it wasn t even possible to use the data on it as part of a RAID rebuild. So I removed that disk and put in one of the other 4TB disks. As the array is comprised of an 8TB disk and 3 other devices that don t add up to 8TB the layout is the 8TB disk having one copy of everything and the other devices having parts of it. So the rebuild process comprised of copying data from the 8TB disk to the 4TB disk. For a RAID array run in the manner of Linux software RAID the rebuild of a RAID-1 involves a linear copy of data which is the optimal case for hard disks, copying 4TB of data in that manner would have an average speed of a bit over 100MB/s and take about 11 hours. With BTRFS the source disk has to be updated for each block that is recreated so the process was bottlenecked on writing to the 8TB disk. It took 2 days 23 hours to complete. The process involved reading 3,478,031MB and writing 4,405,545MB. The system was live for the process and some cron jobs etc were writing to the array, but in the 12 hours since the rebuild completed the array has had 7,038MB written. So presumably during the rebuild time about 42G of actual data were written to the array and the other 4.3TB written to the 8TB disk were from the process of copying 3.5TB from it to another device. Iostat reported that there were 645.36 TPS for the duration of the rebuild which seems like a decent number for a hard drive, during the process iostat reported that the drive had 99%+ of IO capacity used for the duration. While waiting for this to complete I wrote a blog post about storage trends [2]. One thing I didn t mention in that post is that if you are the type of person who checks the rebuild process fifty times a day then that should be counted as part of the cost of using slow storage. If instead of an 8TB disk plus some SSD storage I had used 2*4TB disks and 1*4TB SSD as I had considered doing then instead of having 3.8TB on one device I would have had about 2.5TB and the reconstruct would have probably taken 2/3 of the time. If I had moved the array to 3*4TB SSDs then it would have taken a small fraction of the time. One thing to note is that I made a mistake in this operation by removing the failed device instead of doing a btrfs replace operation which can be significantly faster. If I had correctly done this then I would have written a blog post about the rebuild taking 2 days or something, the issues of hard drives being slow and me compulsively checking the progress would still apply.

8 April 2023

Russell Coker: Storage Trends 2023

It s been 2 years since my last blog post about storage trends [1]. Minimum Storage <=2TB In 2021 I stated that as MSY had 2TB disks for $72 and 2TB SSD for $245 it was barely worth considering a 2TB disk and anything less than 2TB wasn t worth considering. Now for 2TB storage from MSY NVMe starts at $129, SATA SSD starts at $143, and hard disks start at $75. I guess that NVMe is slightly cheaper due to some combination of economies of scale for manufacture/sales and having less postage costs. It really doesn t make sense to consider hard disks for storing 2TB or less. For storage for a small system (PC or laptop) the cheapest storage device is $19 for a 128G SATA SSD. But it wouldn t make sense to buy that when you can get a 256G SATA SSD for $22 or a 240G NVMe device for $23, saving $3 on storage wouldn t make any sense. For 512G of storage the prices are $32 for NVMe and $33 for SATA SSD. For 1TB of storage the prices start at $68 for SATA SSD and $74 for NVMe. Probably for the vast majority of home users 1TB of SATA SSD or NVMe is the minimum storage capacity to consider, the $50 price difference isn t much when considering the entire price of a PC or laptop and anything less than 1TB will run out quickly with modern use. Larger Storage 4TB+ The price for 4TB of storage from MSY is NVMe starting at $349, SATA SSD starting at $369, and hard disks starting at $115. If you need 4TB of RAID-1 storage then it might be worth saving $470 and getting hard drives for a home user. For business use it wouldn t make sense. Some laptops have two NVMe sockets so 8TB of storage (or 4TB of RAID-1) in a laptop would be interesting. For 8TB of storage the MSY prices are SATA SSD for $739 and hard drives starting at $179. Probably hard drives are the best choice for most situations where there is a need to store 8TB or more of data. But the prices are low enough to make 8TB SSD something that can be considered for home use, it doesn t seem that long ago that the 4TB hard drives I bought for my home server were almost that expensive. Big Storage MSY doesn t have 8TB NVMe, such devices are on eBay for $1700 for regular M.2 NVMe and just under $1000 for U.2 (server hot-swap devices). So if you need more than 8TB of NVMe storage then probably buying a server with U.2 built in is the correct solution. For home users who need more than 8TB of storage hard drives are a good solution. One issue is that the more affordable and larger drives use Shingled Magnetic Recording (SMR) which has some different performance characteristics for certain workloads. Apparently SMR performs badly for anything other than large file storage. Why MSY? I primarily used MSY prices for this post because they are a reliable local store that has a list of prices that is easy to read. For everything in this post I can get better prices by using eBay, the StaticIce.com.au price comparison site [2], and the computing section of the OzBargain site that gamifies finding good prices [3]. But a good shopping strategy nowadays is to compare prices in a store to determine what items are in your price range and then shop around for price on the item you want. Checking all the different bargain sites for all these items would take much more time than I want to spend writing a blog post! Conclusion Hard drives don t make sense for the vast majority of systems. Not for laptops, not for typical desktop PCs, and not for small business servers (say 8TB or less of RAID storage). Hard drives only make sense for dozens or hundreds of TB of storage and even then finding out how to deal with SMR issues is going to increase the pain of deployment. Maybe using a combination of SSD and hard drives to deal with the SMR issues is going to be a competitive advantage for NAS vendors in future. NVMe looks like it s on the way to being cheaper than SATA SSD. There is likely to be a good market for systems with NVMe as the only internal storage option. The long term trend of systems without DVD drives and with maybe 2.5 SATA devices but no 3.5 SATA devices seems to lead to the GPU being the major part that needs to fit into a PC case that determines the overall size. Maybe there will be a new trend of GPUs connected to riser cards so they can be parallel to the motherboard for compact PCs. For business desktop systems (IE low powered graphics hardware as it s not for gaming) I expect that the trend will be towards NUC type devices which are already based around the M.2 as a storage device size.

3 April 2023

Matt Brown: Retrospective: Mar 2023

The key decision I made mid-March was to commit to pursuing ventilation monitoring as my primary product development focus. Prior to that decision, I hoped to use my writing plan to drive a breadth-first survey of the opportunities for each of my product ideas before deciding which had the best business potential to focus on first. Two factors changed my mind:
  1. As noted last month, I m finding the writing process much slower and harder than I expected the survey across all the ideas may not complete until mid-year or later!
  2. I ve realised that having begun building co2mon.nz last year, to stop work on the project at this point would leave me feeling that I had not done justice to developing the product and testing the market - seeing it to a conclusion is important to me.
This decision is an explicit choice to prioritize seeing a project through to a conclusion (successful, or otherwise) regardless of whether or not it has the highest potential of the various ideas I could invest time into. I m comfortable making that trade-off in this instance, but I am going to bound my time investment to two months. I ll evaluate at the end of May whether I m seeing sufficient traction and potential to justify continuing further with the idea. I had only one fully uninterrupted work week in March due to a combination of days out due to school trips, two LandSAR call outs and various farm maintenance tasks. April will be similarly disrupted given school holidays and a planned family trip to Brisbane. Sharpening my focus feels particularly necessary given this reality to ensure I m not spread overly thin.

Goal Scoring See last month s retrospective for a refresher on my scoring methodology.

Consulting - 4/10 Goal: Execute a series of successful consulting engagements, building a reputation for myself and leaving happy customers willing to provide testimonials that support a pipeline of future opportunities. Consulting hours were down from February, hitting only 31% of target this month as the client didn t make use of all the hours I had allocated for them. I didn t invest any time in advertising my services or developing new clients or projects over the month, which will now become a priority for April.

Product Development - 4/10 Goal: Grow my product development skill set by taking several ideas to MVP stage with customer feedback received, and launch at least one product which generates revenue and has growth potential. With the new focus entirely on co2mon.nz, I spent a lot of time re-working and developing my thinking around how I want to take this forward, specifically trying to analyse where I saw an opportunity in the market. After attending a workshop on finding product market fit using quantifiable metrics at the Southern SaaS conference this month, I ve realised that much of the time I spent on this analysis is too insular and focused on my own observations - I need to get out and talk to a lot more people and get more feedback on their needs and understanding of the space instead. Seems obvious in retrospect! I also spent a few days beginning to build another batch of prototype CO2 monitors so I have some units to use for experimentation and testing with potential customers as I get out and have those conversations. I can probably build one or two more batches of prototype monitors before needing to look at PCB assembly in earnest.

Professional Network Development - 8/10 Goal: To build a professional relationship with at least 30 new people this year. This goal continues to be my highlight with 8 new contacts added this month and catch-ups with 4 existing people I had not spoken to for a while. I joined the KiwiSaaS central community and attended the SouthernSaas conference this month as well, which has been time well spent given the workshop learnings discussed above.

Writing - 3/10 Goal: To publish a high-quality piece of writing on this site at least once a week. I published a single post, the first half of my updated ventilation monitoring business plan. I continue to find the writing process much harder and slower than I hoped or expected and remain well below my target publishing rate, but one post is better than zero! I tested working with an editor I contracted via UpWork who provided some very useful feedback on the structure of my writing which helped to unblock some of my progress. I plan to continue doing this for at least a few more posts.

Community - 5/10 Goal: To support the growth of my local technical community by volunteering my experience and knowledge with others through activities such as mentoring, conference talks and similar.

Feedback As always, I d love to hear from you if you have thoughts or feedback triggered by anything I ve written above.

30 March 2023

Jonathan McDowell: Buttering up my storage

(TL;DR: I ve been trying out btrfs in some places instead of ext4, I ve hit absolutely zero issues and there are a few features that make me plan to use it more.) Despite (or perhaps because of) working on storage products for a reasonable chunk of my career I have tended towards a conservative approach to my filesystems. By the time I came to Linux ext2 was well established, the move to ext3 was a logical one (the joys of added journalling for faster recovery after unclean shutdowns) and for a long time my default stack has been MD raid with LVM2 on top and then ext4 as the filesystem. I ve dabbled with other filesystems; I ran XFS for a while on my VDR machine, and also when I had a large tradspool with INN, but never really had a hard requirement for it. I ve ended up adminning a machine that had JFS in the past, largely for historical reasons, but don t really remember any issues (vague recollections of NFS problems but that might just have been NFS being NFS). However. ZFS has gathered itself a significant fan base and that makes me wonder about what it can offer and whether I want that. Firstly, let s be clear that I m never going to run a primary filesystem that isn t part of the mainline kernel. So ZFS itself is out, because I run Linux. So what do I want that I can t get with ext4? Firstly, I d like data checksumming. As storage gets larger there s a bigger chance of silent data corruption and while I have backups of the important stuff that doesn t help if you don t know you need to use them. Secondly, these days I have machines running containers, VMs, or with lots of source checkouts with a reasonable amount of overlap in their data. Disk space has got cheaper, but I d still like to be able to do some sort of deduplication of common blocks. So, I ve been trying out btrfs. When I installed my desktop I went with btrfs for / and /home (I kept /boot as ext4). The thought process was that this was a local machine (so easy access if it all went wrong) and I take regular backups (so if it all went wrong I could recover). That was a year and a half ago and it s been pretty dull; I mostly forget I m running btrfs instead of ext4. This is on a machine that tracks Debian testing, so currently on kernel 6.1 but originally installed with 5.10. So it seems modern btrfs is reasonably stable for a machine that isn t driven especially hard. Good start. The fact I forget what filesystem I m running points to the fact that I m not actually doing anything special here. I get the advantage of data checksumming, but not much else. 2 things spring to mind. Firstly, I don t do snapshots. Given I run testing it might be wiser if I did take a snapshot before every apt-get upgrade, and I have a friend who does just that, but even when I ve run unstable I ve never had a machine get itself into a state that I couldn t recover so I haven t spent time investigating. I note Ubuntu has apt-btrfs-snapshot but it doesn t seem to have any updates for years. The other thing I didn t do when I installed my desktop is take advantage of subvolumes. I m still trying to get my head around exactly what I want them for, but they provide a partial replacement for LVM when it comes to carving up disk space. Instead of the separate / and /home LVs I created I could have created a single LV that would have a single btrfs filesystem on it. / and /home would then be separate subvolumes, allowing me to snapshot each individually. Quotas can also be applied separately so there s still the potential to prevent one subvolume taking all available space. Encouraged by the lack of hassle with my desktop I decided to try moving my sbuild machine over to use btrfs for its build chroots. For Reasons this is a VM kindly hosted by a friend, rather than something local. To be honest these days I would probably go for local hosting, but it works and there s no strong reason to move. The point is it s remote, and so if migrating went wrong and I had to ask for assistance I d be bothering someone who s doing me a favour as it is. The build VM is, of course, running LVM, and there was luckily some free space available. I m reasonably sure the underlying storage involves spinning rust, so I did a laborious set of pvmove commands to make sure all the available space was at the start of the PV, and created a new btrfs volume there. I was advised that while btrfs-convert would do the job it was better to create a fresh filesystem where possible. This time I did create an initial root subvolume. Configuring up sbuild was then much simpler than I d expected. My setup originally started out as a set of tarballs for the chroots that would get untarred + used for the builds, which is pretty slow. Once overlayfs was mature enough I switched to that. I d had a conversation with Enrico about his nspawn/btrfs setup, but it turned out Russ Allbery had written an excellent set of instructions on sbuild with btrfs. I tweaked my existing setup based on his details, and I was in business. Each chroot is a separate subvolume - I don t actually end up having to mount them individually, but it means that only the chroot in use gets snapshotted. For example during a build the following can be observed:
# btrfs subvolume list /
ID 257 gen 111534 top level 5 path root
ID 271 gen 111525 top level 257 path srv/chroot/unstable-amd64-sbuild
ID 275 gen 27873 top level 257 path srv/chroot/bullseye-amd64-sbuild
ID 276 gen 27873 top level 257 path srv/chroot/buster-amd64-sbuild
ID 343 gen 111533 top level 257 path srv/chroot/snapshots/unstable-amd64-sbuild-328059a0-e74b-4d9f-be70-24b59ccba121
I was a little confused about whether I d got something wrong because the snapshot top level is listed as 257 rather than 271, but digging further with btrfs subvolume show on the 2 mounted directories correctly showed the snapshot had a parent equal to the chroot, not /. As a final step I ran jdupes via jdupes -1Br / to deduplicate things across the filesystem. It didn t end up providing a significant saving unfortunately - I guess there s a reasonable amount of change between Debian releases - but I think tried it on my desktop, which tends to have a large number of similar source trees checked out. There I managed to save about 5% on /home, which didn t seem too shabby. The sbuild setup has been in place for a couple of months now, and I ve run quite a few builds on it while preparing for the freeze. So I m fairly confident in the stability of the setup and my next move is to transition my local house server over to btrfs for its containers (which all run under systemd-nspawn). Those are generally running a Debian stable base so there should be a decent amount of commonality for deduping. I m not saying I m yet at the point where I ll default to btrfs on new installs, but I m definitely looking at it for situations where I think I can get benefits from deduplication, or being able to divide up disk space without hard partitioning space. (And, just to answer the worry I had when I started, I ve got nowhere near ENOSPC problems, but I believe they re handled much more gracefully these days. And my experience of ZFS when it got above 90% utilization was far from ideal too.)

Russell Coker: Links March 2023

Interesting paper about a plan for eugenics in dogs with an aim to get human equivalent IQ within 100 generations [1]. It gets a bit silly when the author predicts IQs of 8000+ as there will eventually be limits of what can fit in one head. But the basic concept is good. Interesting article about what happens inside a proton [2]. This makes some aspects of the Trisolar series and the Dragon s Egg series seem less implausible. Insightful article about how crypto-currencies really work [3]. Basically the vast majority of users trust some company that s outside the scope of most financial regulations to act as their bank. Surprisingly the author doesn t seem to identify such things as a Ponzi scheme. Bruce Schneier wrote an interesting blog post about AIs as hackers [4]. Cory Doctorow wrote an insightful article titled The Enshittification of TikTok which is about the enshittification of commercial Internet platforms in general [5]. We need more regulation of such things. Cat Valente wrote an insightful article titled Stop Talking to Each Other and Start Buying Things: Three Decades of Survival in the Desert of Social Media about the desire to profit from social media repeatedly destroying platforms [6]. This Onion video has a good point, I don t want to watch videos on news sites etc [7]. We need ad-blockers that can block video on all sites other than YouTube etc. Wired has an interesting article about the machines that still need floppy disks, including early versions of the 747 [8]. There are devices to convert the floppy drive interface to a USB storage device which are being used on some systems but which presumably aren t certified for a 747. The article says that 3.5 disks cost $1 each because they are rare that s still cheaper than when they were first released. Android Police has an interesting article about un-redacting information in PNG files [9]. It seems that some software on Pixel devices hasn t been truncating files when editing them, just writing the new data over top and some platforms (notably Discord) send the entire file wuthout parsing it (unlike Twitter for example which removes EXIF data to protect users). Then even though a PNG file is compressed from the later part of the data someone can deduce the earlier data. Teen Vogue has an insightful article about the harm that influencer parents do to their children [10]. Jonathan McDowell wrote a very informative blog post about his new RISC-V computer running Debian [11]. He says that it takes 10 hours to do a full Debian kernel build (compared to 14 minutes for my 18 core E5-2696) so it s about 2% the CPU speed of a high end 2015 server CPU which is pretty good for an embedded devivce. That is similar to some of the low end Thinkpads that were on sale in 2015. The Surviving Tomorrow site has an interesting article about a community where all property is community owned [12]. It s an extremist Christian group and the article is written by a slightly different Christian extremist, but the organisation is interesting. A technology positive atheist versions of this would be good. Bruce Schneier and Nathan E. Sanders co-wrote an insightful article about how AI could exploit the process of making laws [13]. We really need to crack down on political lobbying, any time a constitution is being amender prohibiting lobbying should be included. Anarcat wrote a very informative blog post about the Framework laptops that are designed to be upgraded by the user [14]. The motherboard can be replaced and there are cases designed so you can use the old laptop motherboard as an embedded PC. Before 2017 I would have been very interested in such a laptop. Now I ve moved to low power laptops and servers for serious compiles and a second-hand Thinkpad X1 Carbon costs less than a new Framework motherboard. But this will be a really good product for people with more demanding needs than mine. Pity they don t have a keyboard with the Thinkpad Trackpoint.

Next.

Previous.